FAQs
Linux support for the Brainboxes Ethernet-to-Serial (ES) range of devices
The ES range of Brainboxes devices can be used on Linux. As the devices are configured via a web interface, any modern web browser is able to access the device’s settings to set them as required for your application.
Device Discovery
At this time, Brainboxes do not offer any software to detect the ES devices on a network in the same way that Boost.LAN does on Windows. However, third party utilities are available which can discover the devices using the UPnP protocol. The main tool we recommend is gssdp-discover which is available from the Debian and Ubuntu Linux distribution repositories. To install it on these distributions, use sudo apt install gupnp-tools (you will need administrative/superuser privileges on the machine to perform this).
After installing the program, use the command gssdp-discover | grep -i -A 1 000A4F to discover any devices with a Brainboxes MAC address, and print out the IP address of the device.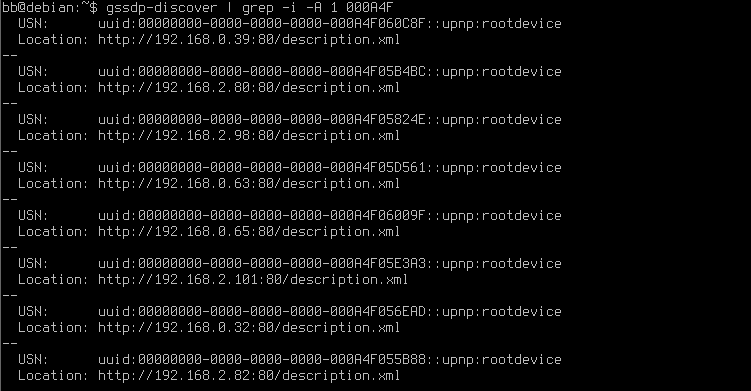
Note: If your network actively blocks UPnP traffic on the network, the utility will likely not discover the devices on your network. Please contact your network administrator if you need help finding the device on your network.
Connecting to the ES device
To connect to the ES device, you can use either the Raw TCP protocol, Telnet, or an RFC2217 aware program to map the device to a virtual TTY port.
Using RawTCP
Using Raw TCP mode, you can implement connecting to the device in your program over a standard TCP socket. Languages like Python and Bash allow you to connect to a TCP socket and exchange data.
To set Raw TCP mode on your ES device:
1) In a web browser (can be from any machine on the same network, does not have to be the same PC you will connect to the ES device with), visit the ES device’s IP address using HTTP (not HTTPS):
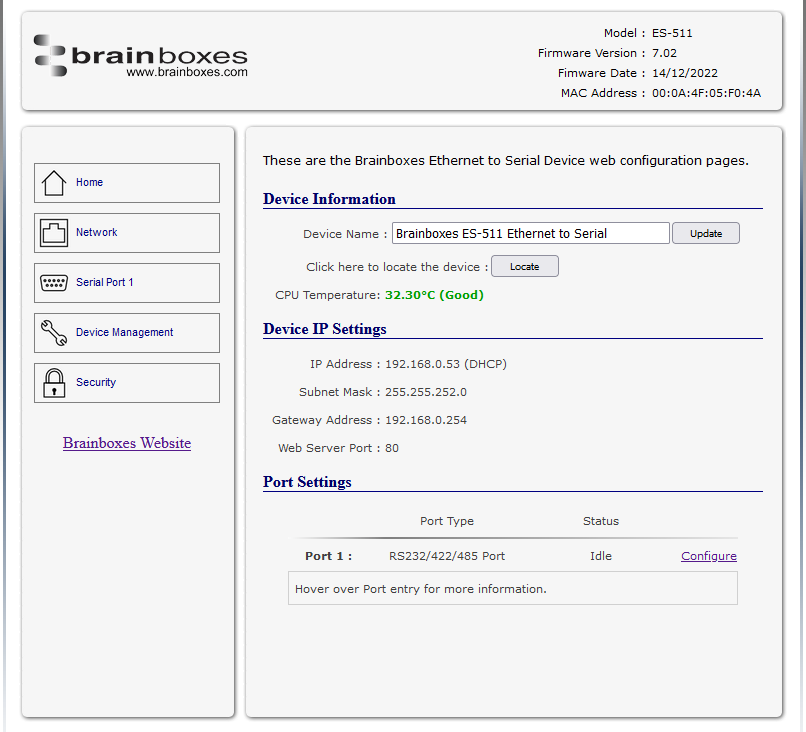
2) Head to the Serial Port x tab, x being whichever serial port you wish to configure
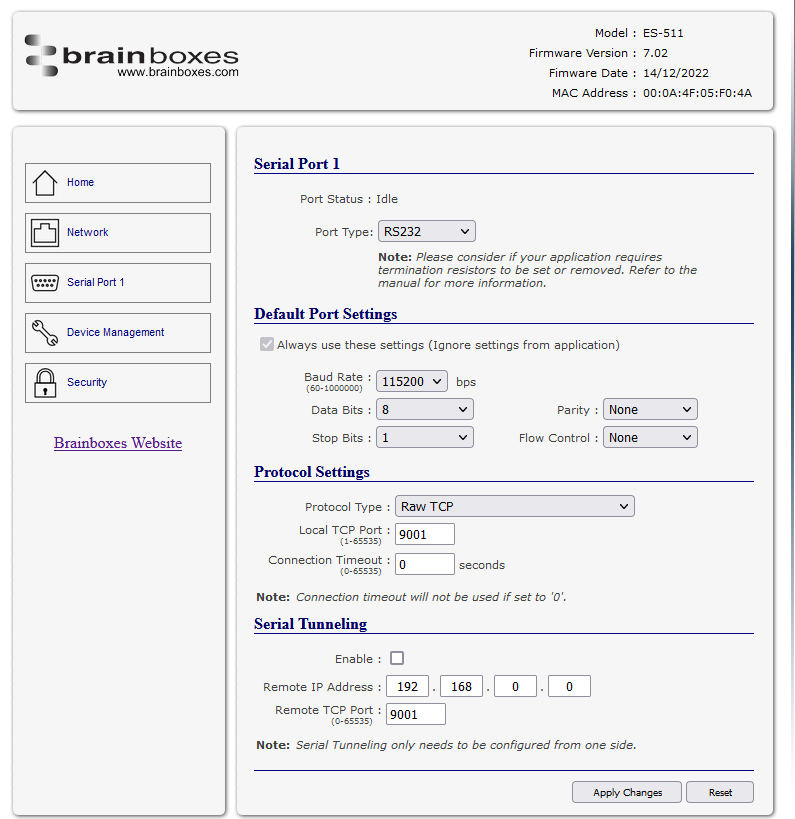
3) Ensure that all of the Serial settings are correct, and set the Protocol Type to Raw TCP Take note of the “Local TCP Port” number:
Now, using your Linux machine you can implement the connection to the ES device. The following are two examples in Python and Bash.
Python
import socket

# Variables for the ES IP and Serial Port
esServer = "192.168.0.53"
esPort = 9001

# Create an instance to use the connection
esSocket = socket.socket(socket.AF_INET, socket.SOCK_STREAM)

# Connect to the ES device using a Raw TCP socket
esSocket.connect((esServer, esPort))

# Send a string to the ES device to be sent through the serial port
esSocket.send(b"Test Message")

# Receive 12 bytes from the buffer
print(esSocket.recv(12))

esSocket.close()
Bash
#!/bin/bash

# ES device server/port variables
esServer=192.168.0.53
esPort=9001

# Start a file descriptor to the ES device
exec 3<>/dev/tcp/$esServer/$esPort

# Send a string to the file descriptor
echo "Test Message" >&3

# Read 12 bytes from the file descriptor
head -c 12 <&3 # Close file descriptors exec 3>&-
exec 3<&-
Using Telnet
If your program requires connectivity over the Telnet protocol, you can connect to the ES device by setting the Protocol Type to Telnet. Clients like PuTTY or the built-in telnet program available on Linux distributions can be used to connect to the ES device and send/receive data to/from the serial port.
PuTTY
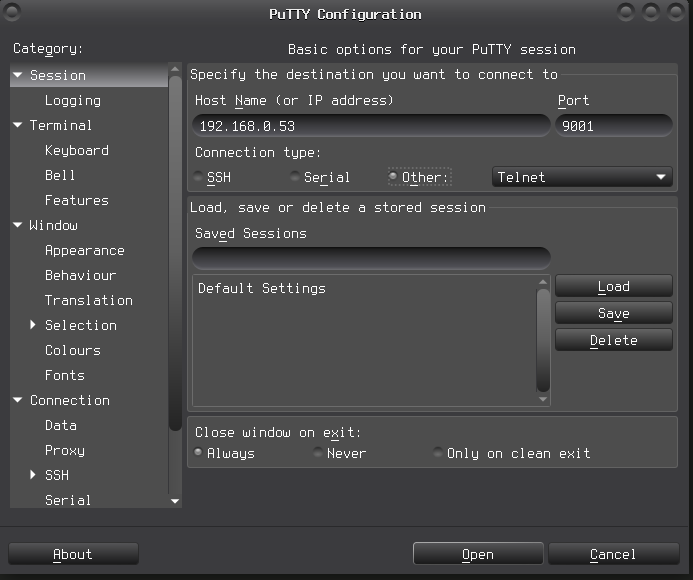
To use PuTTY to open the Ethernet-to-Serial device, enter the IP address of the ES device in the “Host Name (or IP address)” field, and enter the TCP port number of the serial port you wish to use in the “Port” box:
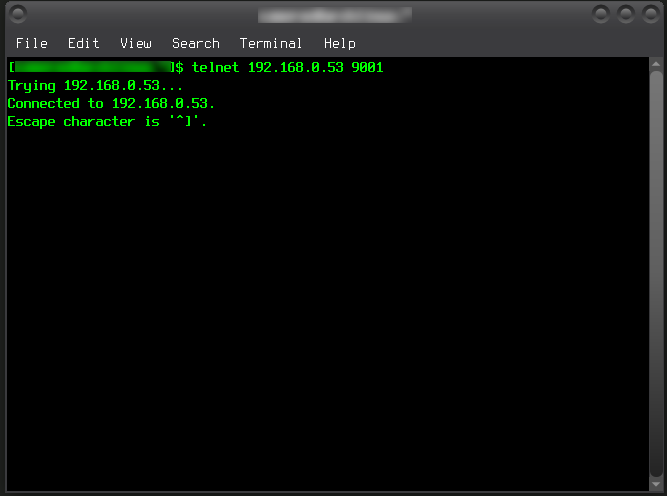
telnet
If you have the telnet program installed (usually available from the inetutils package), you can connect to the device with the command telnet 192.168.0.53 9001, replacing the IP address and port with your setup:
Using Python’s PySerial with RFC2217
As the Brainboxes range of devices are RFC2217-compliant, you can use the Python module PySerial to connect to them. Using RFC2217 you can change the baud rate of the device on the fly, without having to alter the device settings via the web interface. To use RFC2217 mode, ensure the device is set to Telnet mode on the web interface.
RFC2217 also allows you to use CTS/RTS or DTR/DSR flow control, which is not available with RawTCP. An example is provided below to connect to an ES device and continually send a command and wait for a response. This example is written using Python3, Python2 has not been tested.
On a Debian or Ubuntu system, PySerial is available from the package python3-serial. RHEL/CentOS 7 has it available in the pyserial package, though the version available there is quite old. RHEL 8/9 and clones (such as Alma and Rocky) have it available in the package python3-pyserial. Alternatively, it should be available in your distribution using the pip repository, by running pip3 install pyserial.
import serial

# Simple function to continually send the command "READ VOL 1" to an end device and wait for a response.
def read_write_loop(serialDevice):
	while True:
		# PySerial write() function has to encode characters as bytes.
		serialDevice.write(b'READ VOL 1\n')
		buffer = serialDevice.readline() # Alternatively, you could use read(n) to read n amount of bytes before returning, if your response will always be n bytes.
		# Simple loop to continually read the buffer until a "\n" ("Carriage Return", also known as "<CR>") is received, and when so, display it.
		while len(buffer) == 0:
			buffer = serialDevice.readline()
		print(buffer.decode('utf-8'))

# Create a serial instance using PySerial's RFC2217 handler. Connects to the IP address specified and the port number (default 9001).
# Baud rate of 115200, 8 bits, no parity, 1 stop bit, do not open the port until open() is called.
# Using RFC2217, you can dynamically change these, you do not need to specify them beforehand on the ES device. Simply set the property you wish to change (e.g. baudrate) as necessary in your code.
ser = serial.serial_for_url("rfc2217://192.168.0.53:9001", baudrate=115200, bytesize=8, parity=serial.PARITY_NONE, stopbits=1, do_not_open=1)

# Open the port
ser.open()

# Enter the infinite reading/writing loop.
read_write_loop(ser)

# Close the connection gracefully.
ser.close()
Using a virtual TTY port
The ES range of devices can be used as a virtual TTY port with the help of third-party software. A virtual TTY port is analogous to a virtual COM port on Windows, and can be used to allow programs which require communications over a TTY port to use the ES devices. To use this mode, ensure that the ES device is set to Telnet mode.
Brainboxes devices are RFC2217-compliant, and we recommend a utility called ttyNVT to map the serial ports of an ES device to a TTY port. Unfortunately, no Linux distribution packages ttyNVT as a binary package so it must be compiled, but this is a relatively easy process.
To compile the package, the following dependencies must be installed on the system. You will need root/superuser privileges to install these dependencies on the system and to complete the installation process, as well as to initially map the TTY port using the program:
RHEL/Rocky Linux/Alma Linux 9*The CRB repository must be enabled for this distribution. It can be enabled via the use of yum config-manager --set-enabled CRBDevelopment Tools (group)pkgconfigautoconffuse-develwgetkernel-modules-extra
| Linux Distribution | Package dependencies |
|---|---|
| Debian/Ubuntu | autoconfbuild-essentiallibfuse-devpkg-configwget |
| RHEL/CentOS 7* | Development Tools (group)pkgconfigautoconffuse-develwget |
| RHEL/Rocky Linux/Alma Linux 8* | Development Tools (group)pkgconfigautoconffuse-develwgetkernel-modules-extra |
*These instructions may also work on Oracle Linux but have not been tested.
After the dependencies have been installed for your distribution, follow these steps in your terminal program to compile ttyNVT.
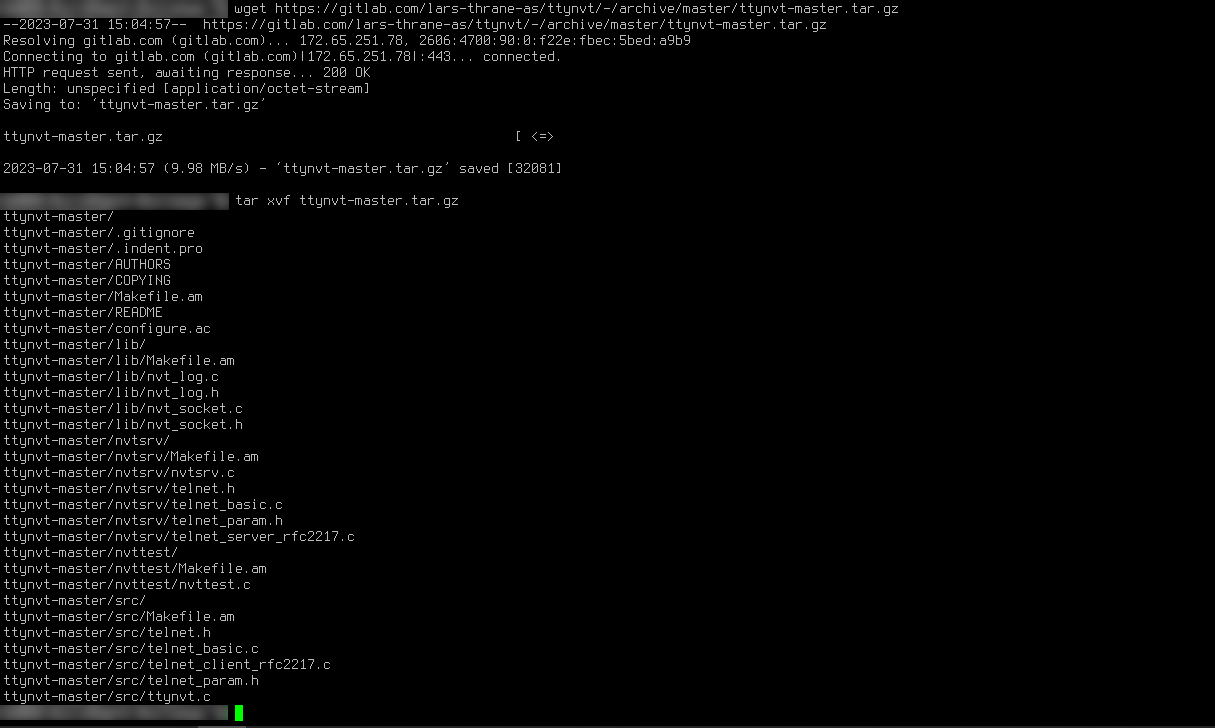
1) In a working directory, download a copy of ttyNVT by running wget https://gitlab.com/lars-thrane-as/ttynvt/-/archive/master/ttynvt-master.tar.gz. This will download the file ttynvt-master.tar.gz to the current directory
2) Extract the files by running tar -xvf ttynvt-master.tar.gz:
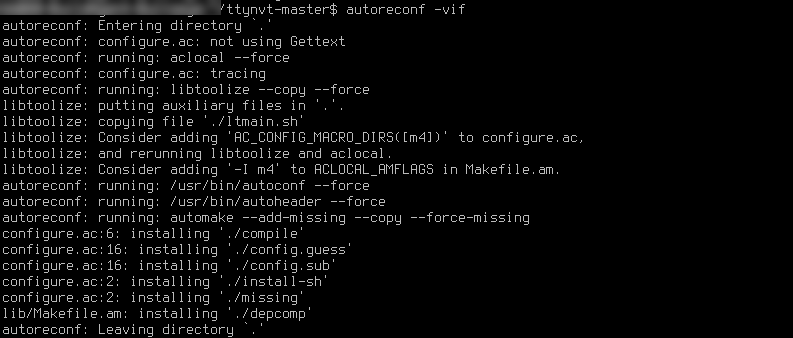
3) Run cd ttynvt-master to enter the ttyNVT directory
4) Run autoreconf -vif to generate a configuration file. When this has finished, run ./configure:
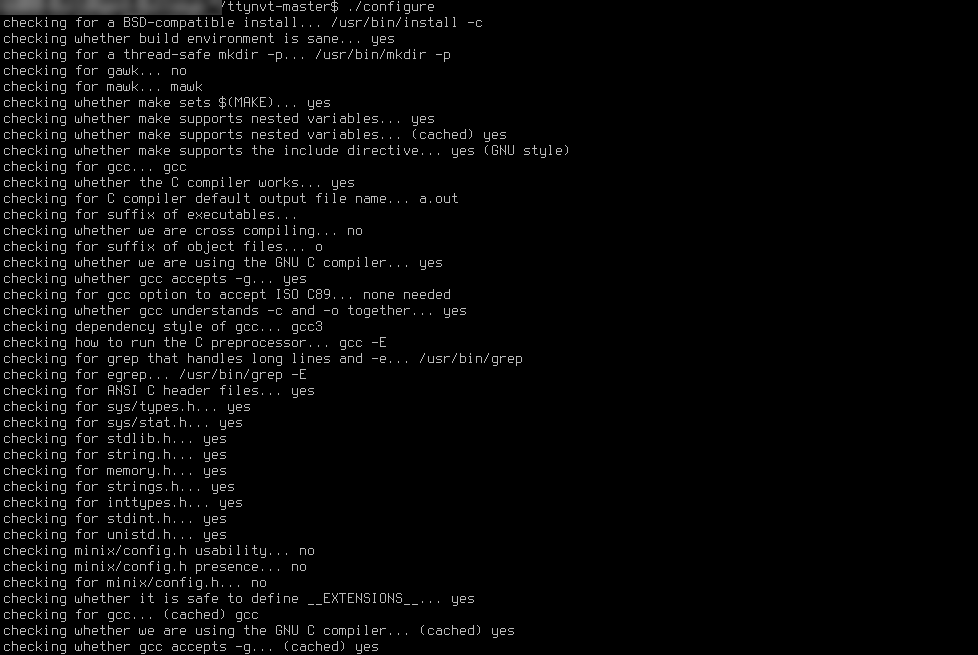
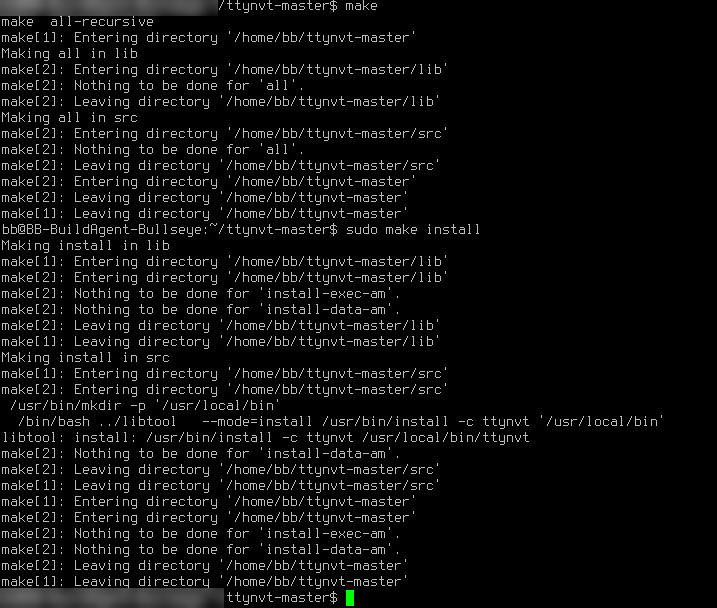
5) Run make followed by make install:
6) Check that ttyNVT was installed by running ttynvt. This should print out “Server must be specified”
7) (optional) If ttyNVT was installed correctly, clean up the directory by running cd .. to change to the previous directory, and run rm -rf ttynvt-master to remove the ttyNVT source folder.
To use ttyNVT, as root/superuser, use the syntax ttynvt -S 192.168.0.53:9001 to connect to the ES device on the IP address and Port that you specify. Optionally, specify -d or -f to keep ttyNVT in the foreground and prevent it from going into the background after the process has started.
The ES device’s Serial Port will now be available at /dev/ttyNVT0, any subsequent ES devices or ports you connect with ttyNVT will be available at the next numerical port (i.e. ttyNVT1, ttyNVT2 etc).
You can now connect to the TTY port using your program, just specify the port as /dev/ttyNVTx, x being the numerical port required.
Permission denied?
If you get an error of Permission Denied when trying to open the ttyNVT port in your client application, you likely need to add your user to a specific group. To find out which group, run the command ls -l /dev/ttyNVTx, x being the ttyNVT port you are trying to open:
![]()
The second string in this image, “dialout” is the group we need to add the user to. To add your user to this group, run the command (as superuser/root) “usermod -a -G groupname username, replacing groupname with the group and username with the name of the user you are trying to connect to the TTY port with. For example, to add the user “bb“, run “usermod -a -G dialout bb“.
After logging out and back in (or rebooting the machine), you should be able to connect to the TTY port as a regular user.
Related FAQs
Related Products
FAQs