This FAQ describes the process of reflashing your BB-400 with the default software image, including the operating system and all default packages, which ships with the device. Typically you will use this image in 1 of two situations:
- The BB-400 gets into a state where the software is corrupt or there are conflicting packages installed, or the settings are altered
- You have finished developing your software on the device and now wish to start again with a default image and then put the final version of your software back onto the BB-400
1. Software, Equipment & Requirements
Must have…
The following check needs to be made before using the Base Image
Go to your WebAdmin Homepage, click on ![]() then
then ![]()
Type in the following command and check the output:
$ cat /usr/share/brainboxes/manuf_info
It’s critical that you first have this file available before continuing. If this command does not return anything, and simply returns an error about a file being missing, it means that you cannot yet use this base image.
Please contact us at [email protected] and allow us to remote in and resolve this issue for you before continuing.
If the command returns some manufacturing information about your BB-400, you can confidently continue.
Software & Equipment
| Software/Equipment | Details |
|---|---|
| Small screwdriver | Used to removing the yellow blanking plate to access your Micro USB connector |
| Micro USB to USB cable | Used for connecting your system to your BB-400 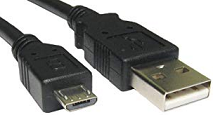 |
| Base image (.img file) | Download here |
For Windows:
| Software/Equipment | Details |
|---|---|
| RPiBoot for Windows | Download here |
| Win32DiskImage (for writing images) | Download here |
For Linux:
| Software/Equipment | Details |
|---|---|
| RPiBoot for Linux | Instructions available here |
| DD on Linux | Instructions available here |
2. Procedure
-
Please first check the EEPROM is programmed on your unit before continuing
Scroll up to Software, Equipment & Requirements for instructions on how to check it
If you do not check and find that it isn’t programmed, it will fail on reboot and will not come back
-
Unplug BB-400, and allow it up to 5 minutes to completely power off
(When the STOPPING LED is completely off) -
Remove the outer case of your BB-400 by pushing down the 2 notches on each side of it using your small screwdriver, before sliding the case off
Please take extra care of the large UPS Capacitors when the BB-400 case has been removed
Please be careful to not damage the ribbon cable when removing or reattaching the BB-400 outer casing -
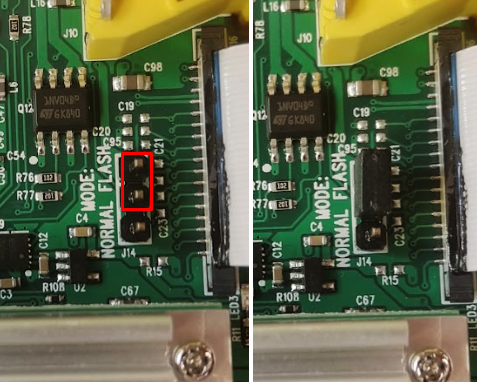
Move the MODE jumper from NORMAL to FLASH:
-
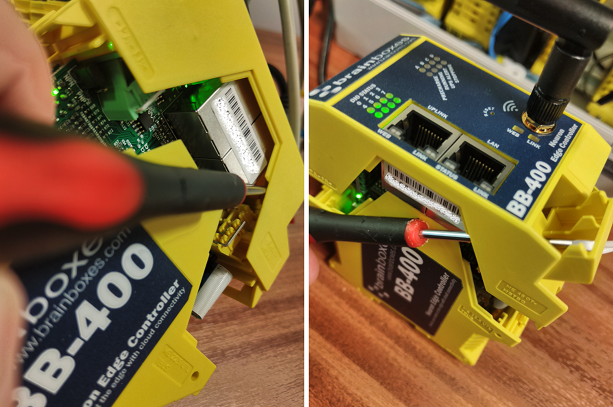
Using your small screwdriver, push the blanking plate located above the yellow terminal block from the inside of your case:
-
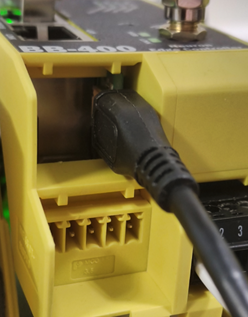
Connect your Micro USB to USB cable from the module to your PC and power on your BB-400:
-
Run RPiBoot and wait for the BB-400 to appear as a new removable HDD
This typically takes around 10 seconds after powering your BB-400 back on -
Flash your BB-400 with the Brainboxes base image:
For Windows:
- Open Win32DiskImager and:
i. Select image: Select the Brainboxes .img file you downloaded earlier
ii. Select the new removable HDD from the ‘Device’ drop down box
iii. Click Write!
For Linux:
- Open your Linux shell terminal and:
i. Use ‘lsblk’ to find which drive number you need to use:
(E.g. /dev/sdx)
ii. In your dd command, pass your .img file to your drive number:
(E.g. dd if=BB400_Base.img of=/dev/sdx bs=4M status=progress oflag=direct)
iii. Wait for the flash to complete!
- Open Win32DiskImager and:
-
When complete, unplug your BB-400 and allow up to 5 minutes to completely power off
(When the STOPPING LED is completely off) -
Move the MODE jumper from FLASH to NORMAL, and power on your BB-400
-
When you power your device back on, it will go through an initial first time boot phase, and then configure and program your unit for the next few minutes. Your device must be left powered on during this operation.
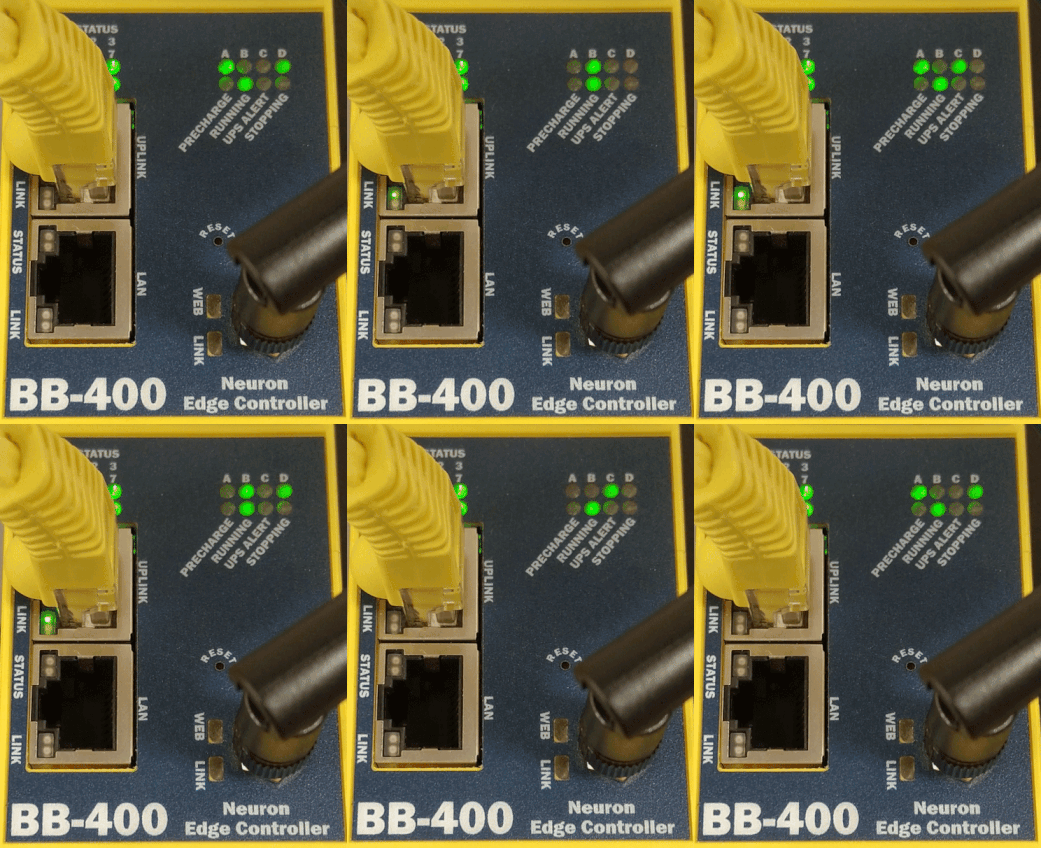
The configure & program state is indicated when the A, B, C and D LEDs start rapidly blinking together. After the LEDs stop blinking, programming has concluded and the device will reboot one final time.
After this, the device will appear on the Brainboxes Boost.IO software, the WebAdmin interface will be accessible, and you will also be able to connect to your BB-400 Wi-Fi access point.
3. Problems & Issues
If any problems occur during the first time boot, the user will be indicated with flashing red LEDs on the Ethernet ports:
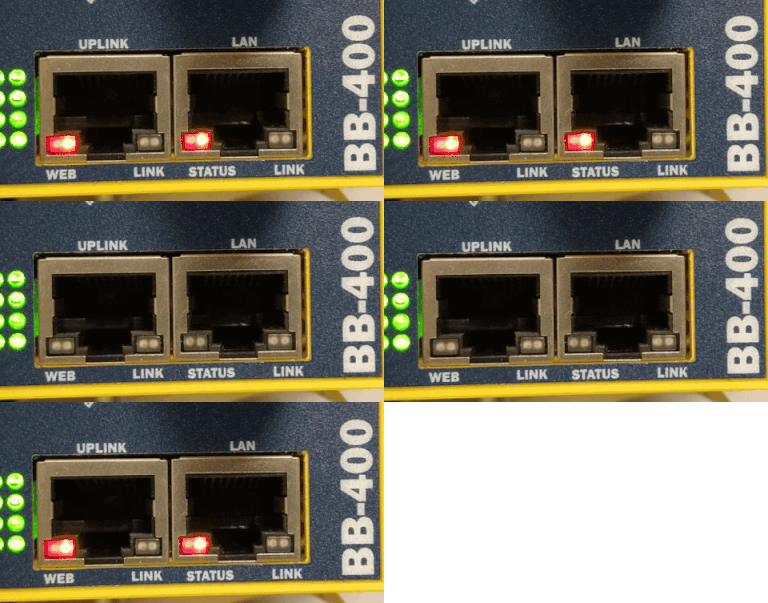
If you do happen to experience any issues, attempt to first reflash your unit once more. Sometimes if the data copied is not checked or verified for its integrity, it can show some issues during the flash.
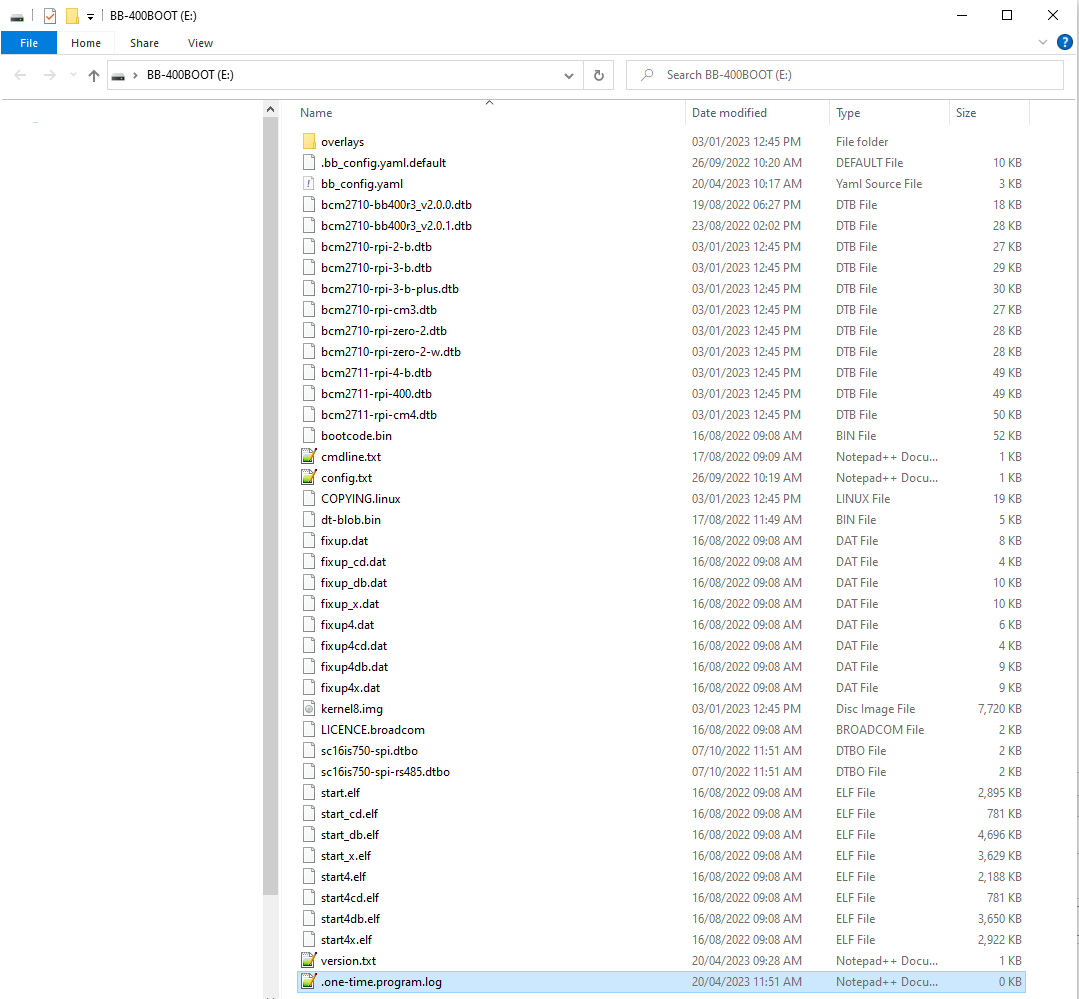
If you continue to have issues, please contact us on [email protected], along with the programming log file located: /boot/.one-time-program.log
To access the /boot partition on your BB-400 after a failure, do the following:
-
Follow the procedure above from step 1 to step 7
-
After the new Removable HDD has appeared, open the boot partition in file explorer and copy the .one-time-program.log to your desktop (or any location on your PC):
-
Attach this log file to your email to us
