FAQs
Cloud computing is the process by which information can be sent over the internet using a variety of different “pay-as-you-go” services. The BB-400 has several cloud services integrated, and this FAQ will explore one of these options: Amazon Web Services (AWS). For more information regarding the other cloud services please refer to the FAQ: What cloud services are available on the BB-400?
NB: This FAQ was written using a BB-400 running Debian GNU/Linux 10 (Buster) and assumes a basic understanding of Node-Red.
What is Amazon Web Services (AWS)?
AWS is a cloud service provided by Amazon. AWS includes an IoT (Internet of Things) Core that allows you to connect your devices to AWS, and also an MQTT client connection to connect Node-Red to AWS. As Node-Red is already set up on the BB-400 by default, AWS is a great method in which to connect your device to the cloud.
Please find at the download link below the Node-Red example flows created for AWS throughout this FAQ:
| Downloads |
| AWS Flow Example |
Create your AWS account
First, we need to create an AWS account by going to https://aws.amazon.com and click on “Sign In”:

Click on “Create a new AWS account”:

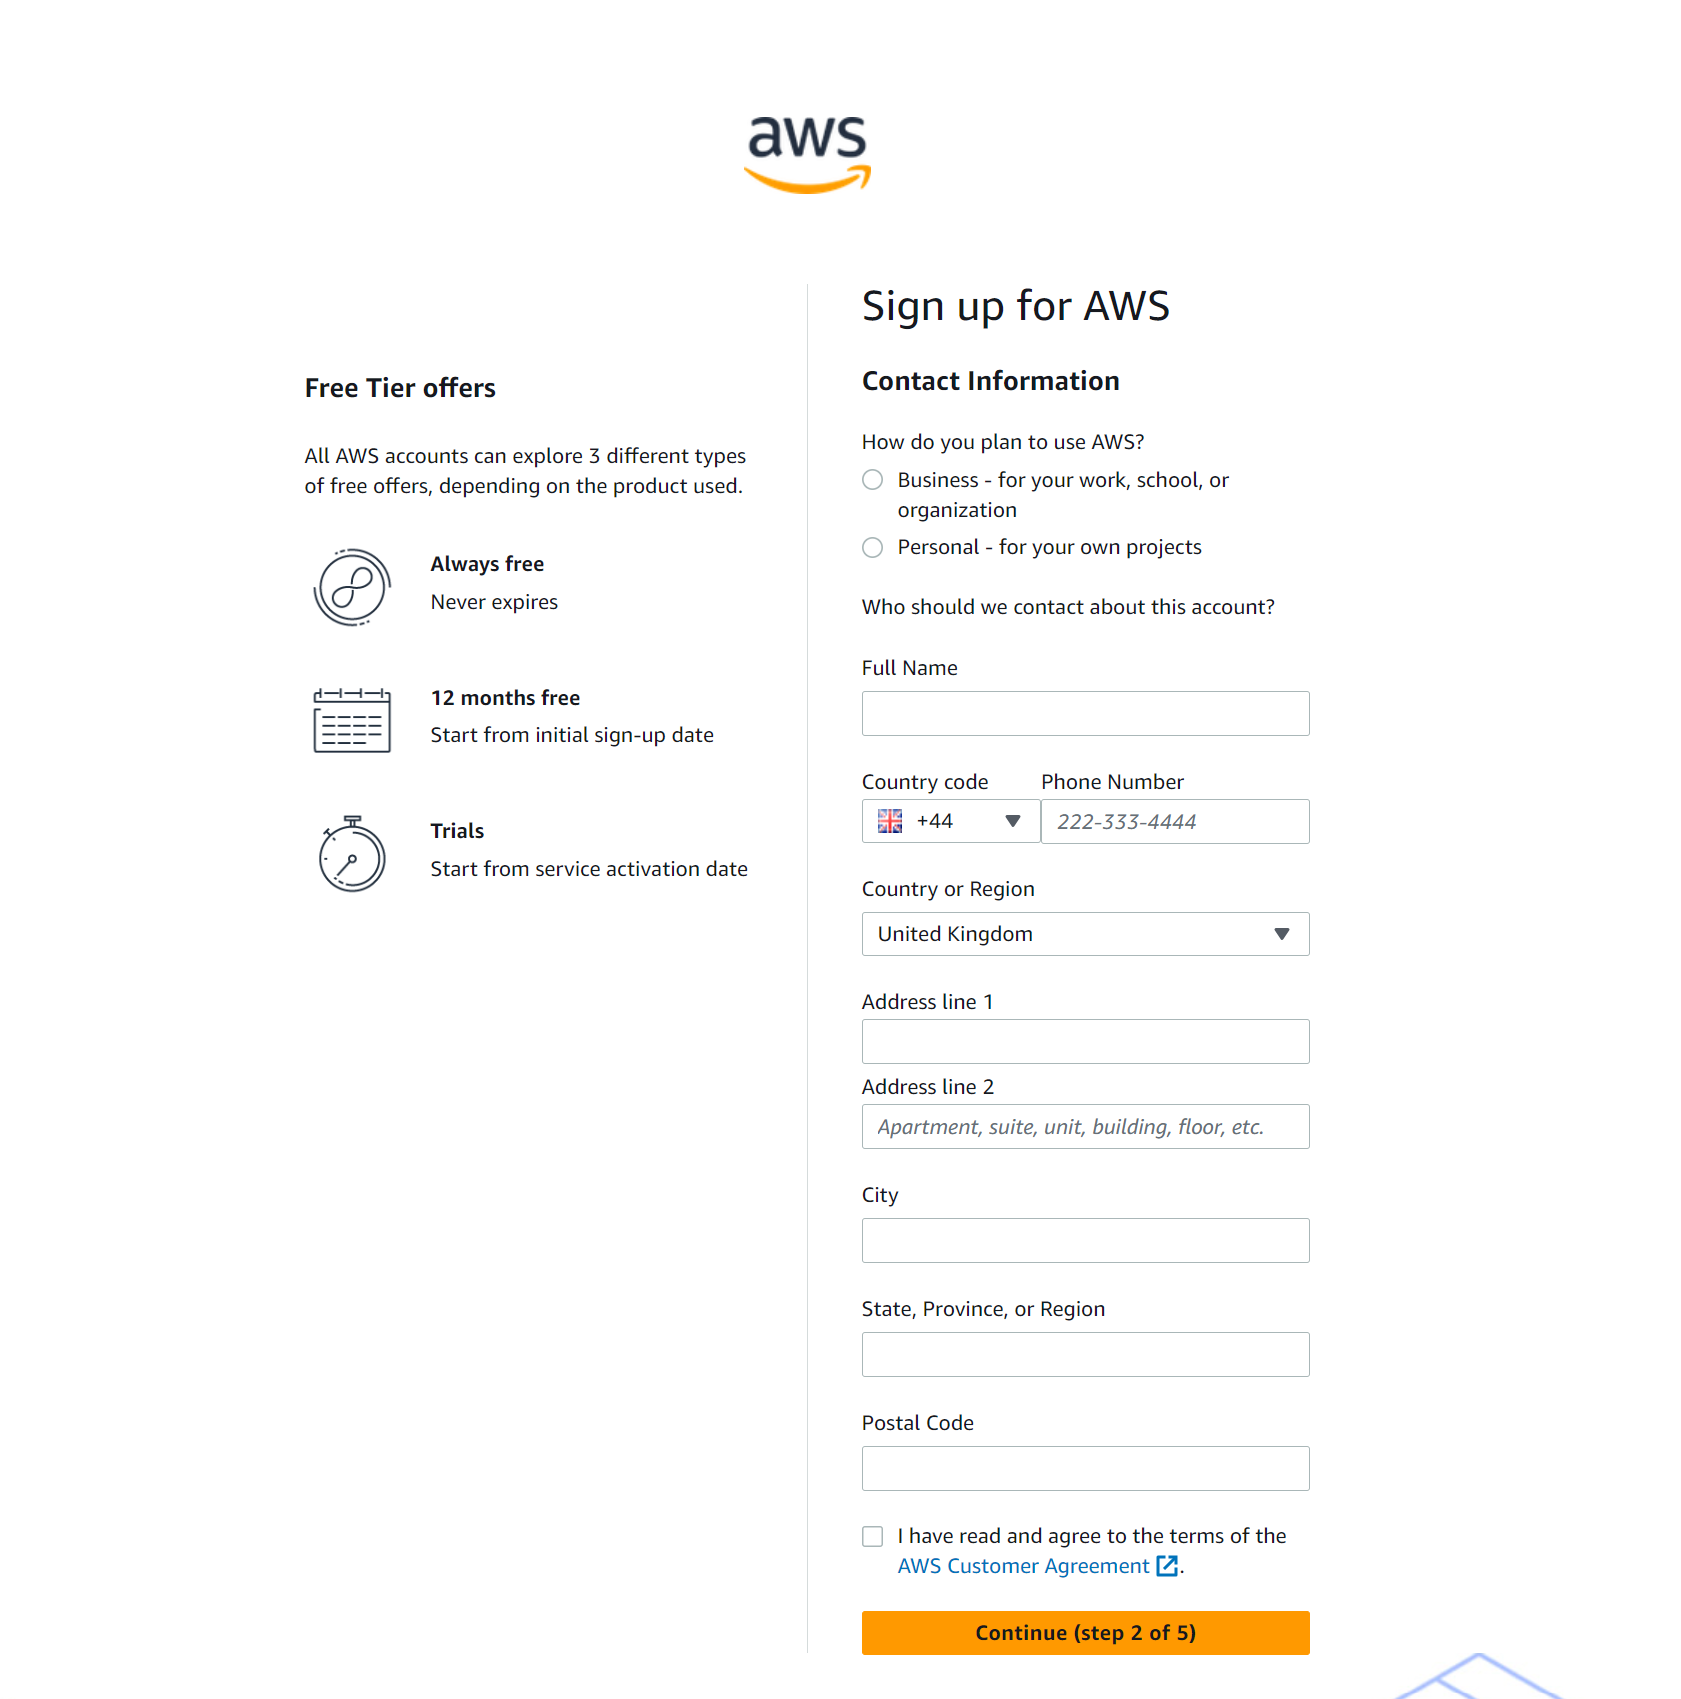
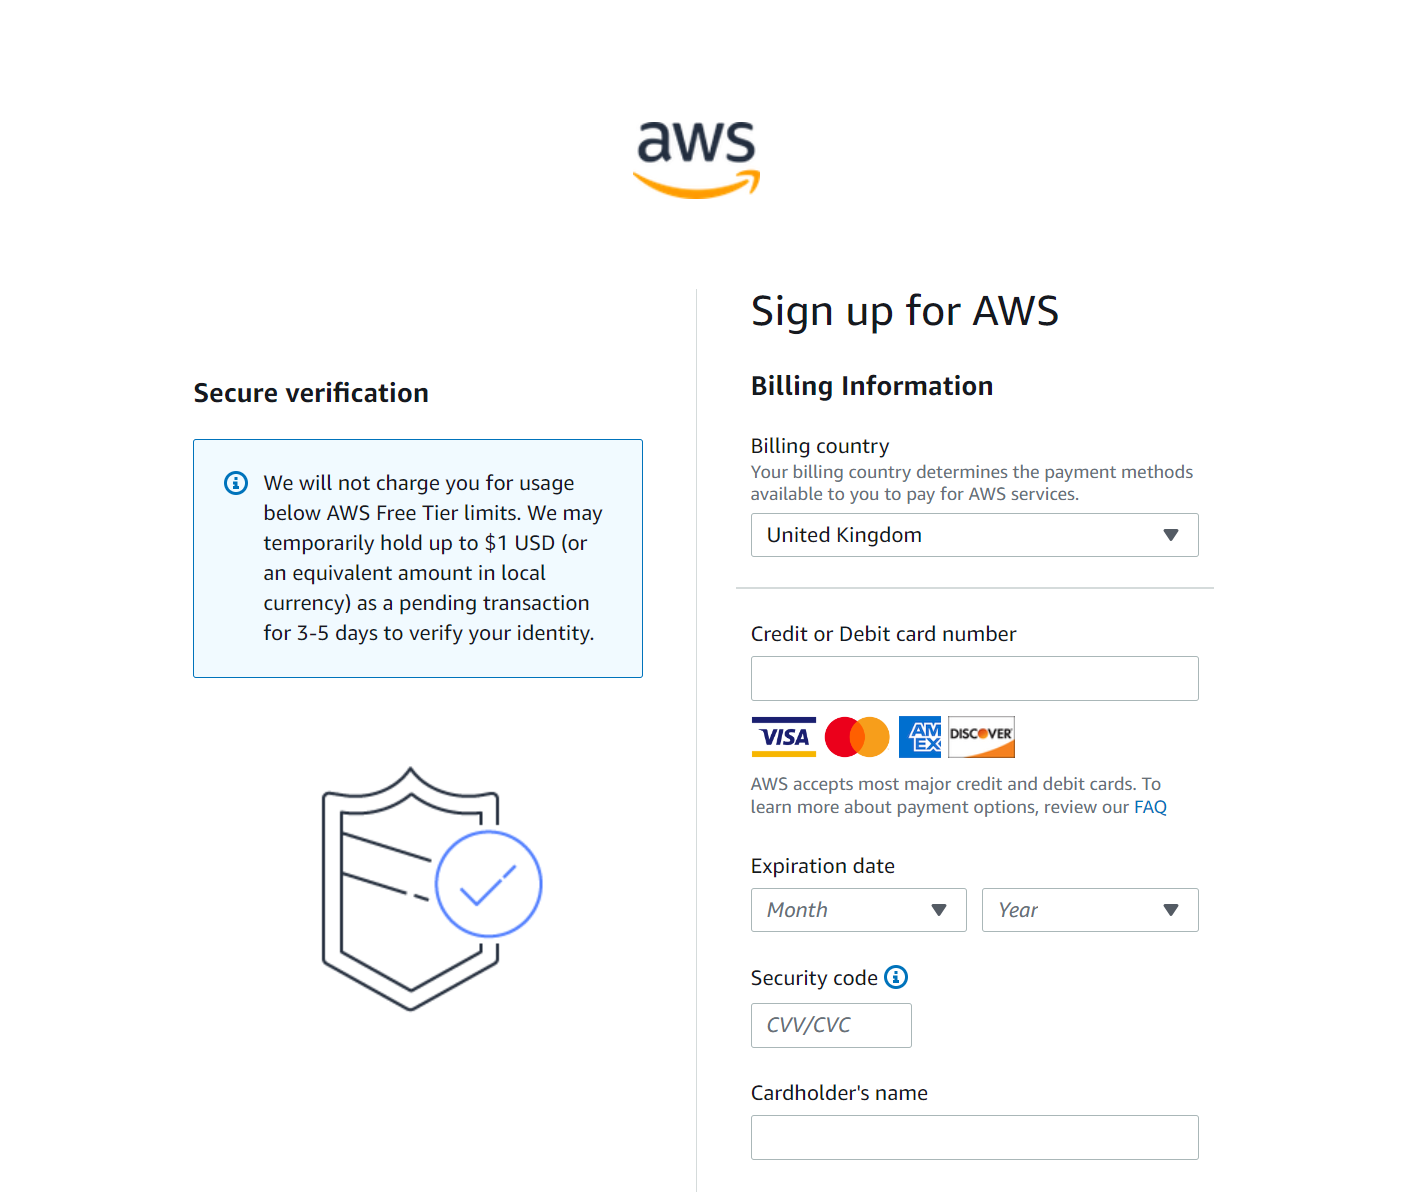
Fill in your details:
Select a support plan:
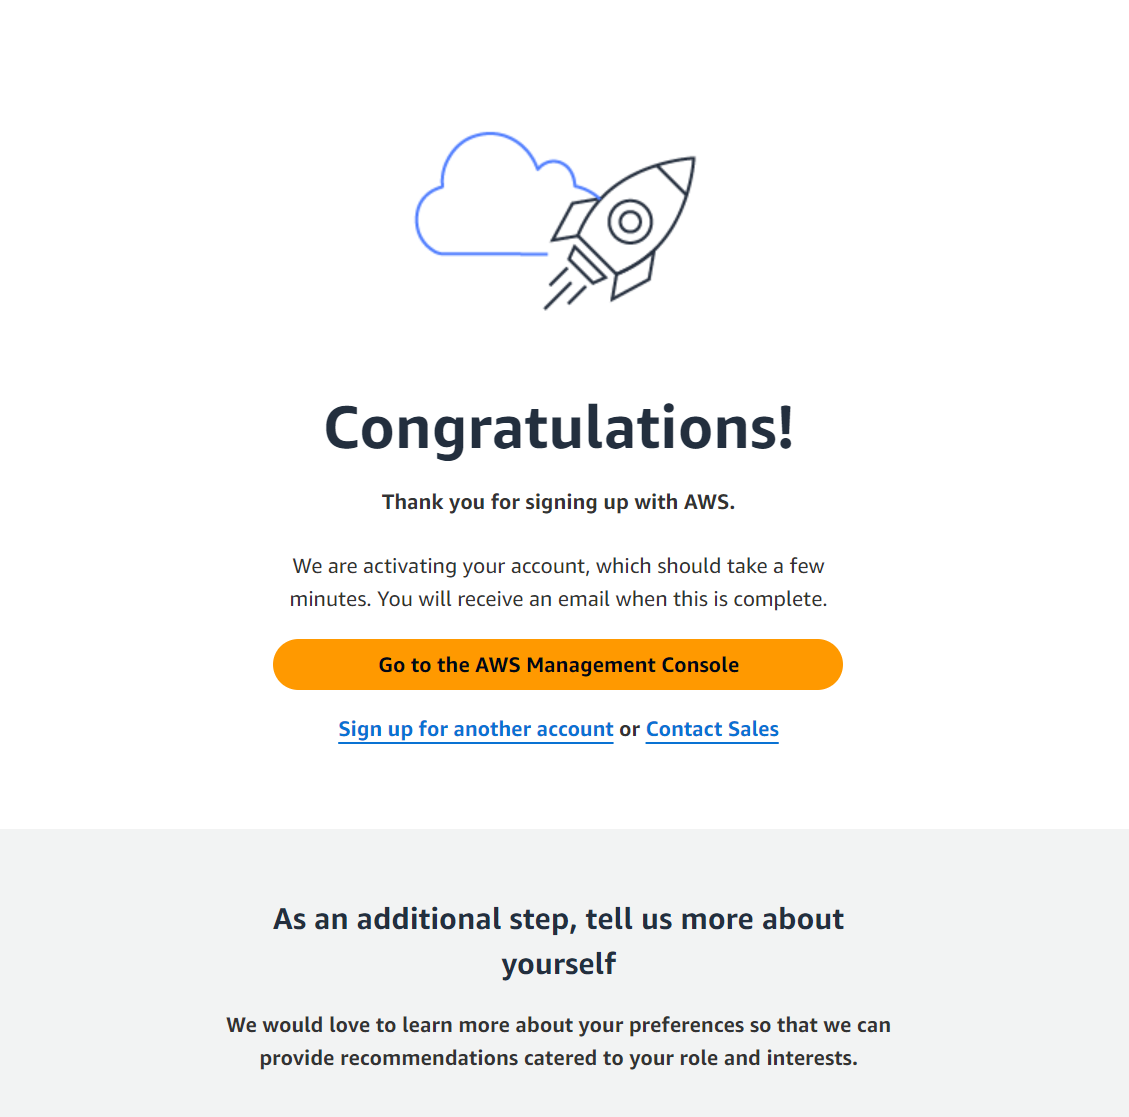
You have set up your AWS account !
Once registered, login as Root user:

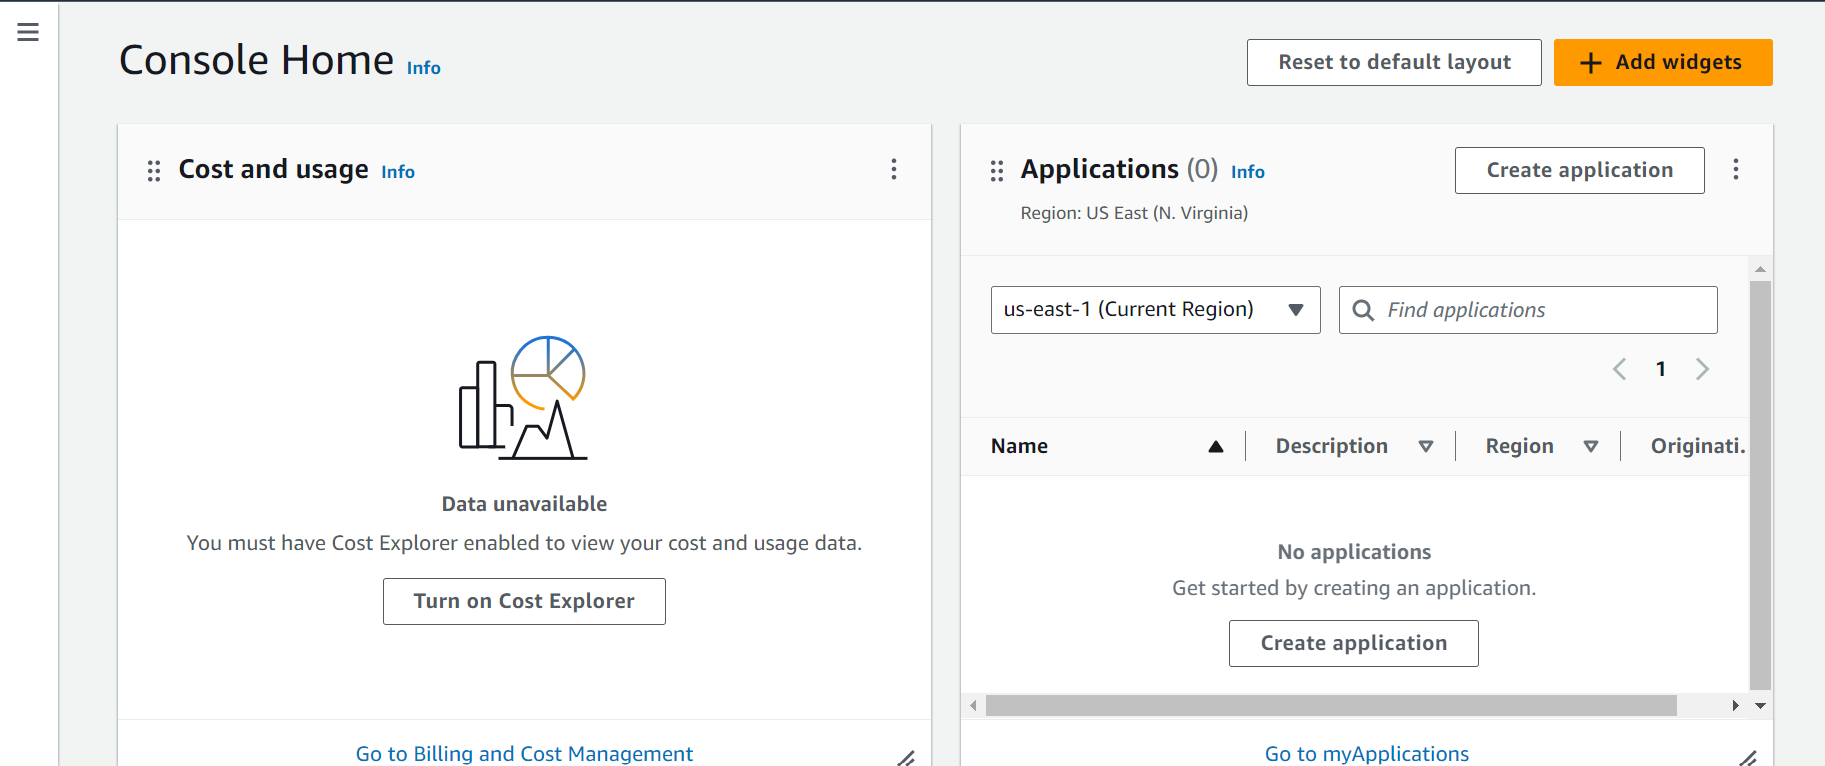
You will be presented with the AWS Management console:
Register a device
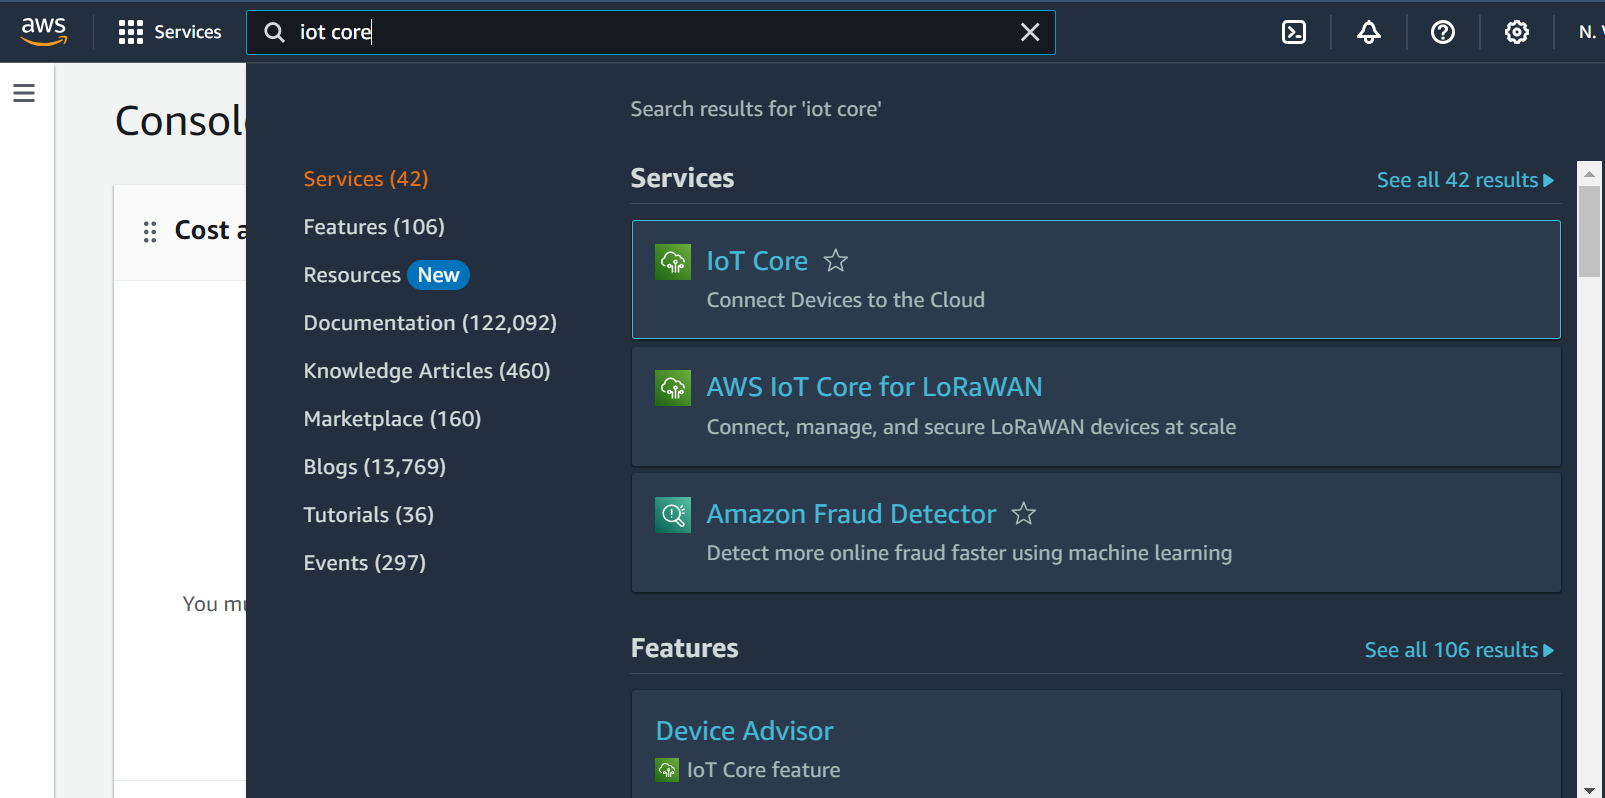
Having created an AWS account, we are ready to register a device. Search for IoT Core in the search bar, then click on “IoT Core”:
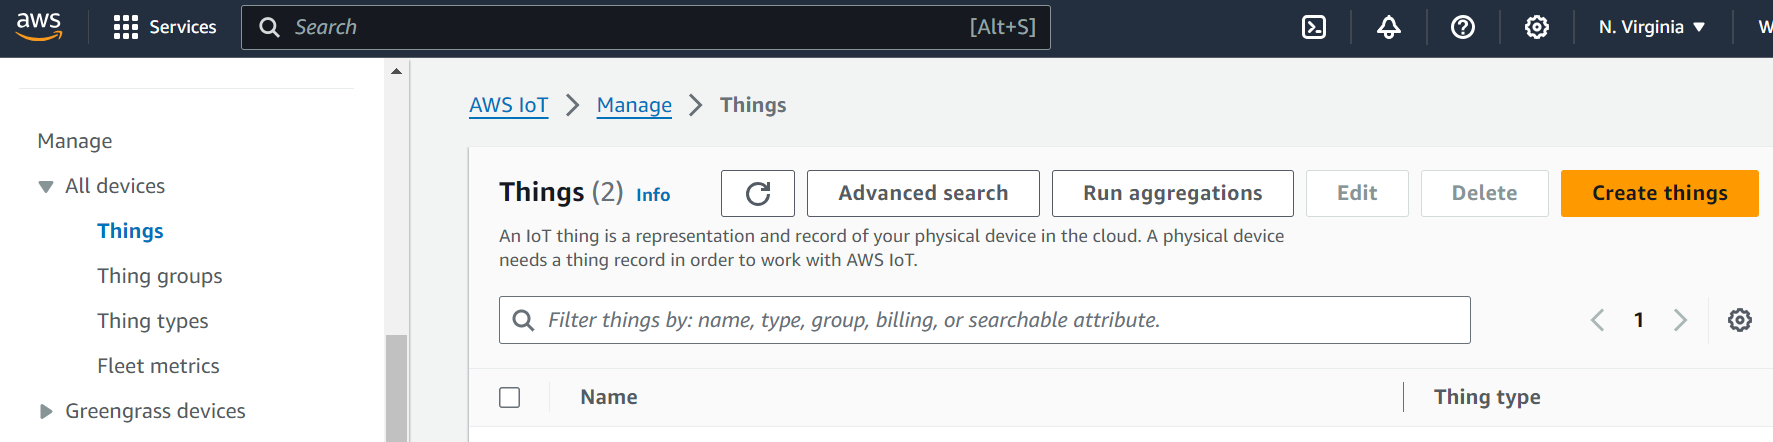
On the side panel click on “Manage” → All devices → “Things” → “Create Things”.
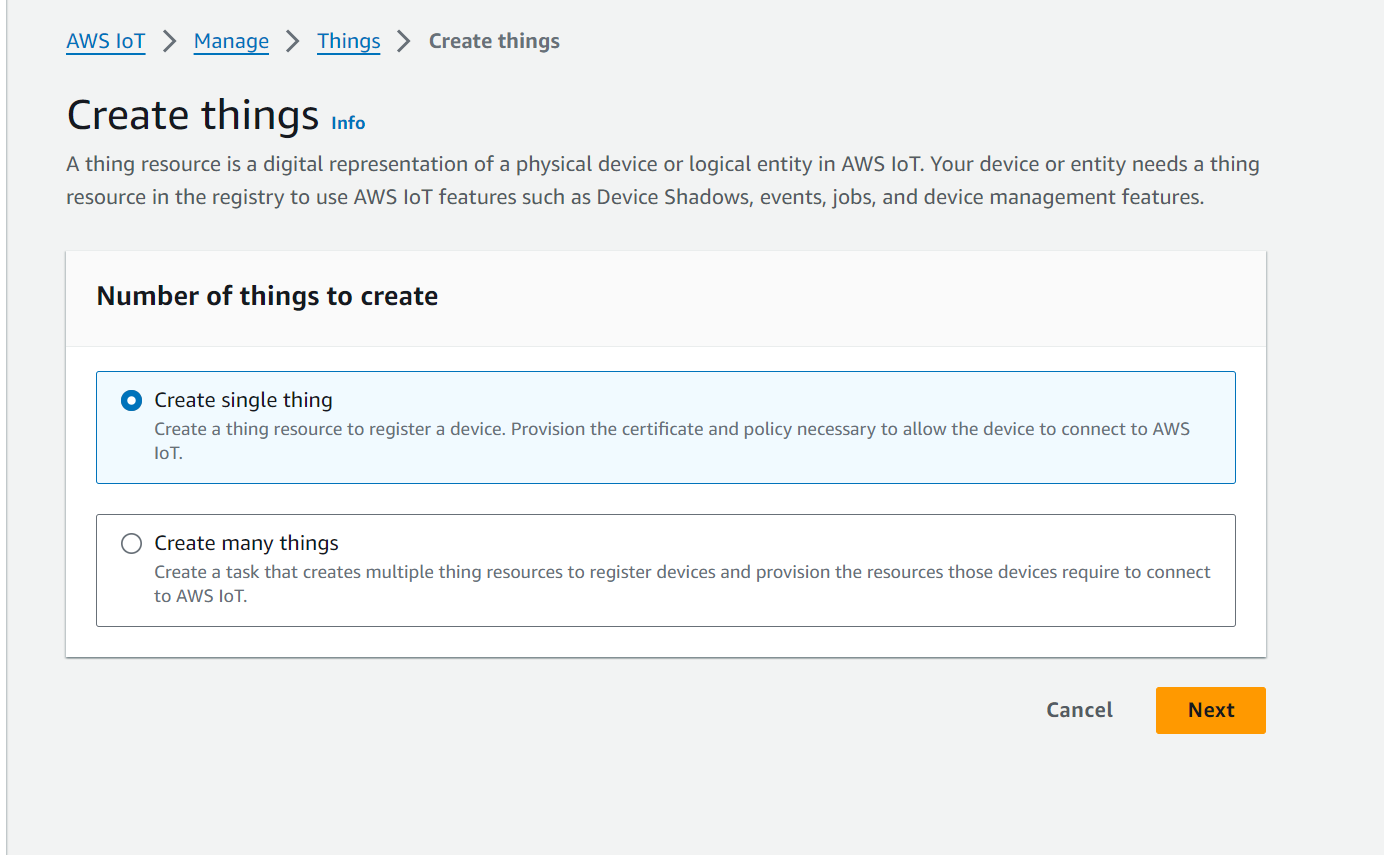
Click on “Create a single thing” (AWS defines a device as a “thing”) and follow the steps provided. We will name our “thing” as the last 4 digits of the MAC address of our BB-400 and click next. Select the “No shadow” option for now:
The next page is about certificates, click on “Auto-generate a new certificate option”. You will be presented with another window asking you to attach policies:
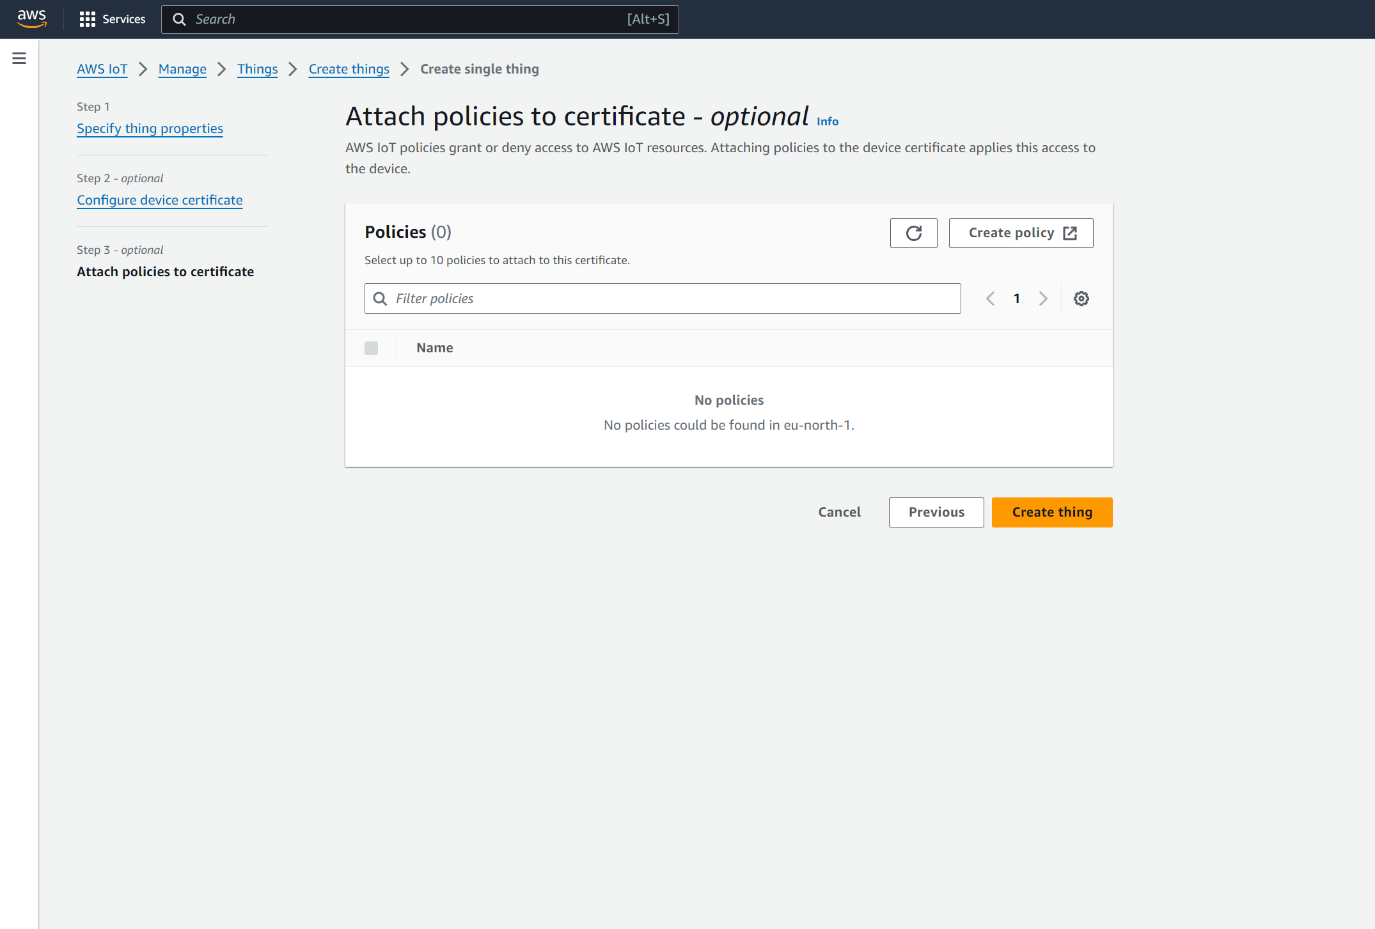
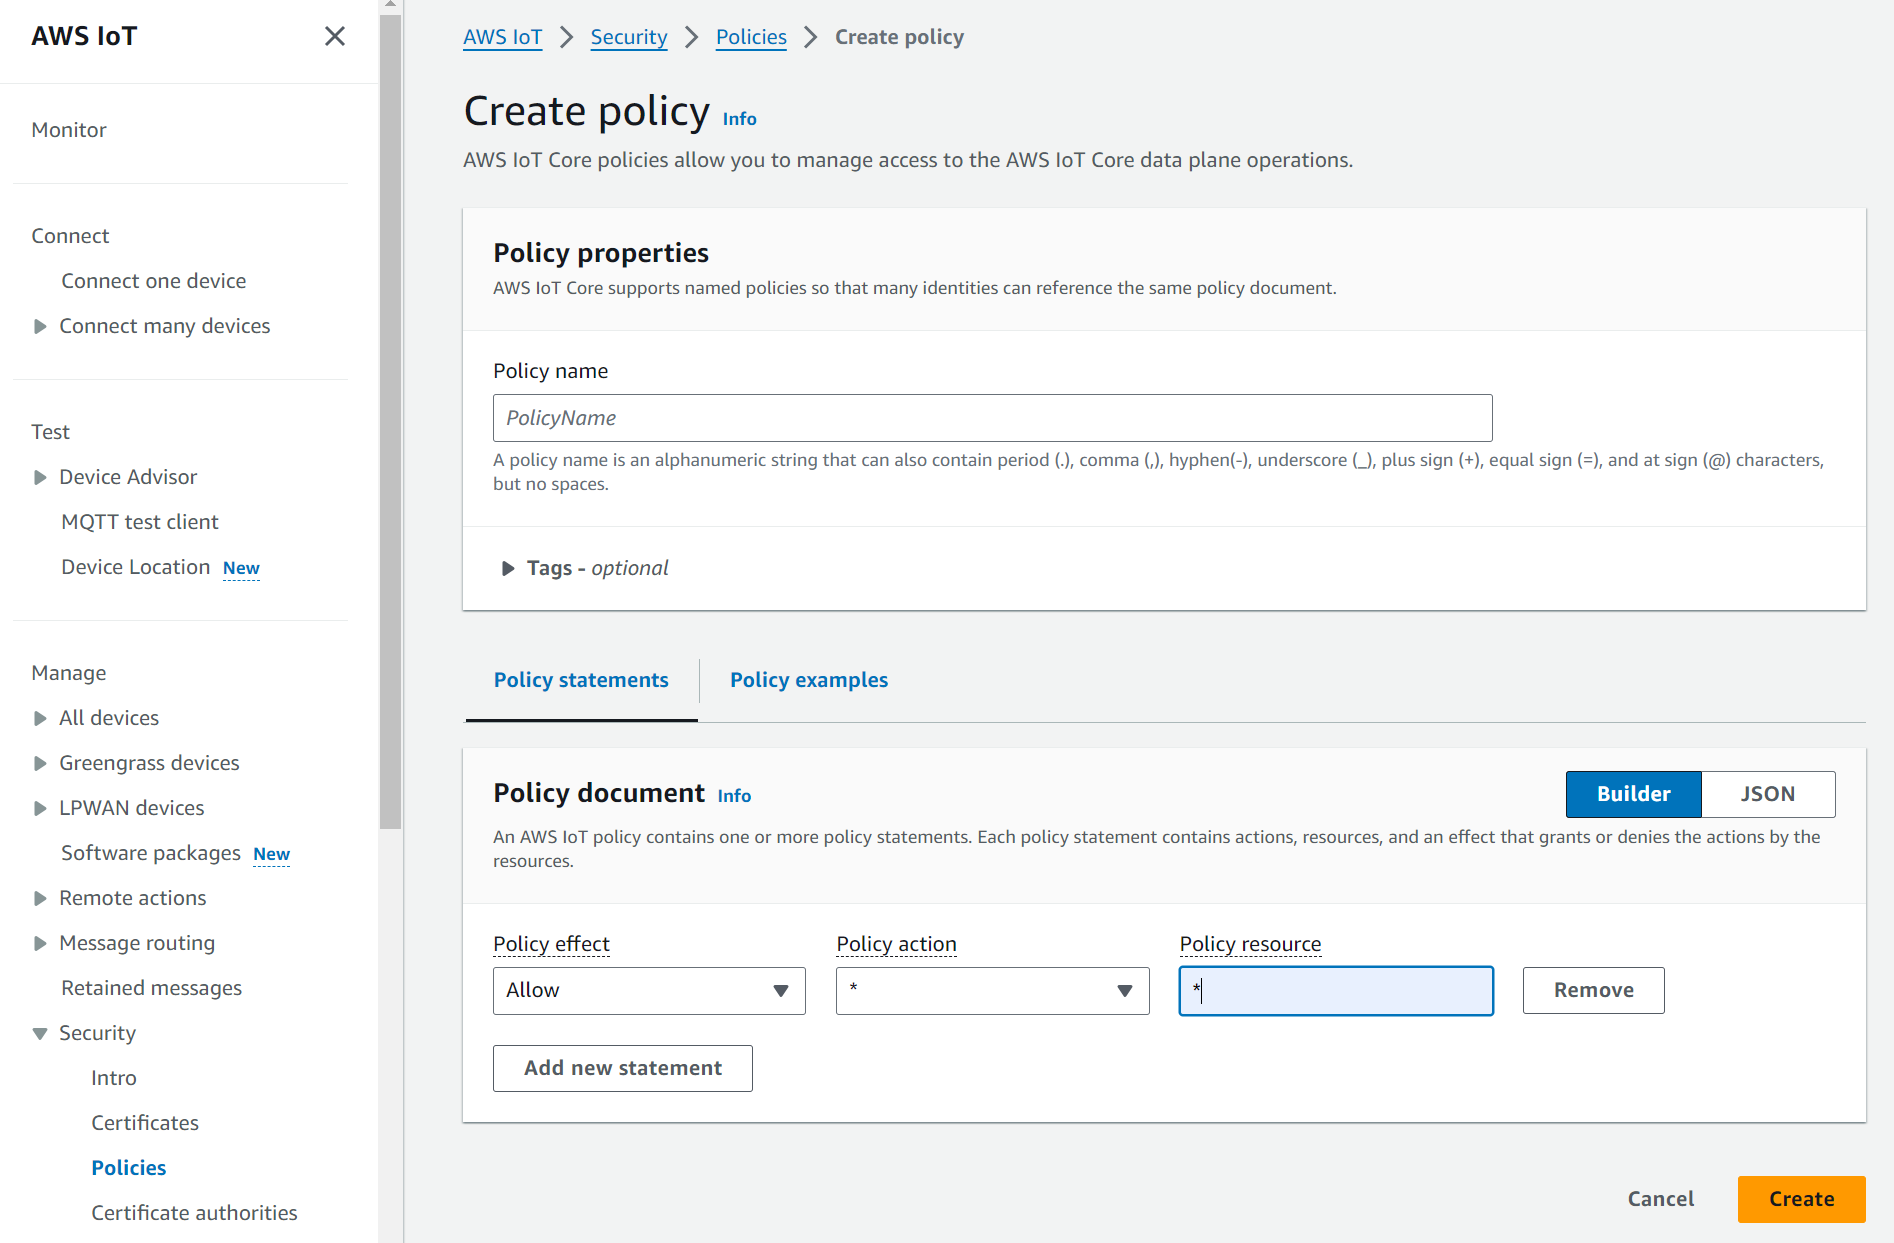
Click on Create policy. A policy provides specified permissions to your device. Give your policy a name. Ensure that in the policy effect select: “Allow”, in the Policy action box type: “*”, and Policy resource type: “*”
Going back to the previous Tab, click on “Create things”. You will be presented with a window pop-up to download certificates and keys.
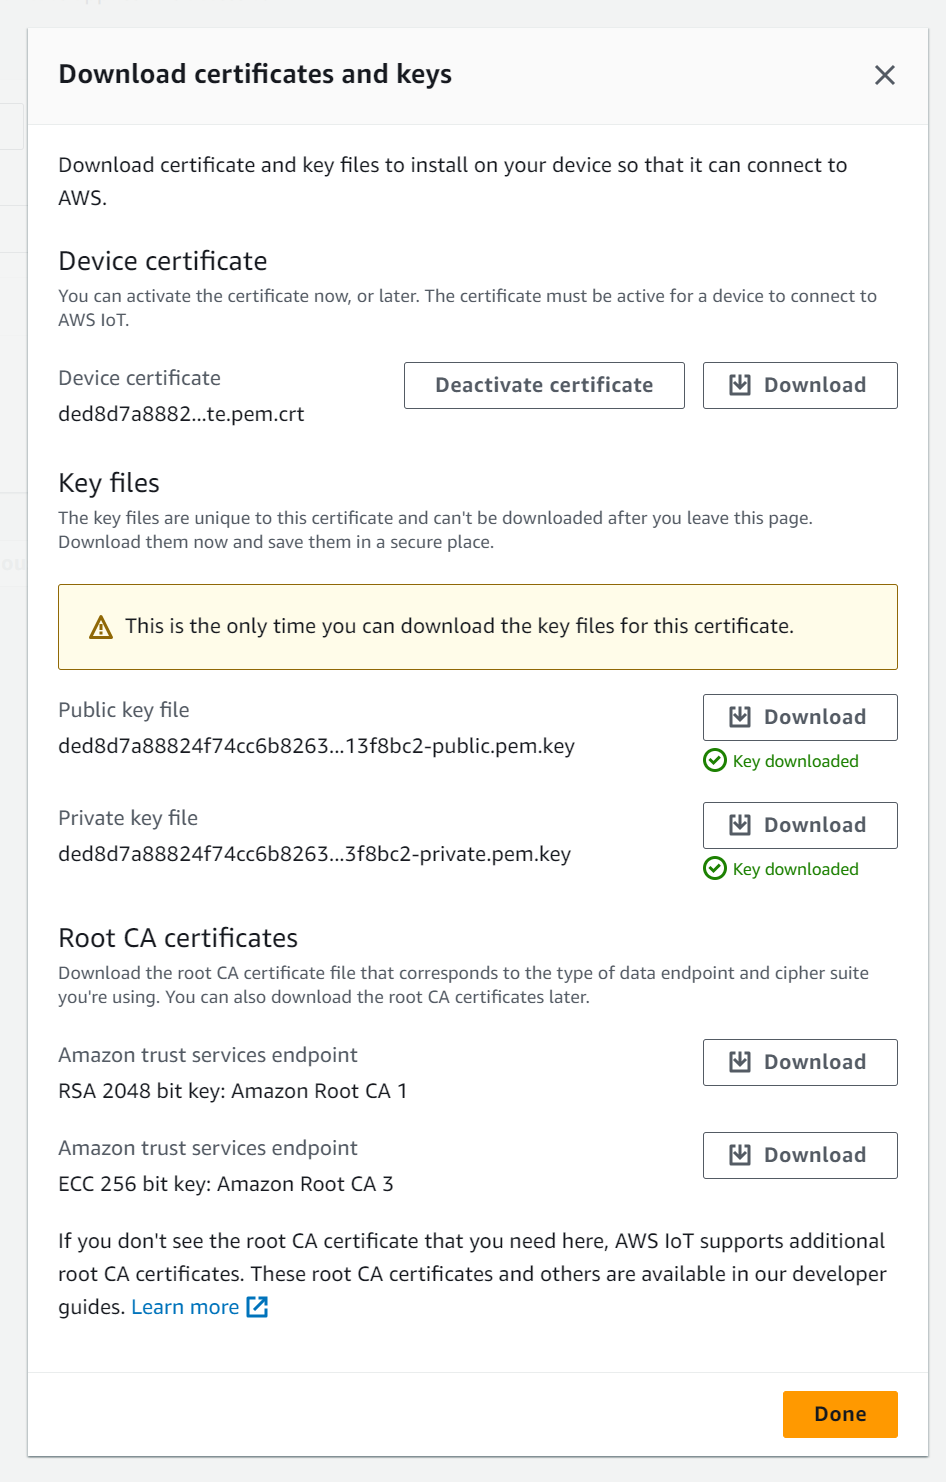
Download the Device certificate, Public key file, Private key file & Root CA files into a known folder as you will need this later on in Node-Red. Next, click “Done”. You have successfully created your first Thing!
Setup Node-Red to send BB-400’s IO status to AWS.
Now we’ll set up our Node-Red instances so that we can connect to AWS, to send and receive data.
First, we will use an inject node ![]() to send data. Double-click to configure it as follows:
to send data. Double-click to configure it as follows:

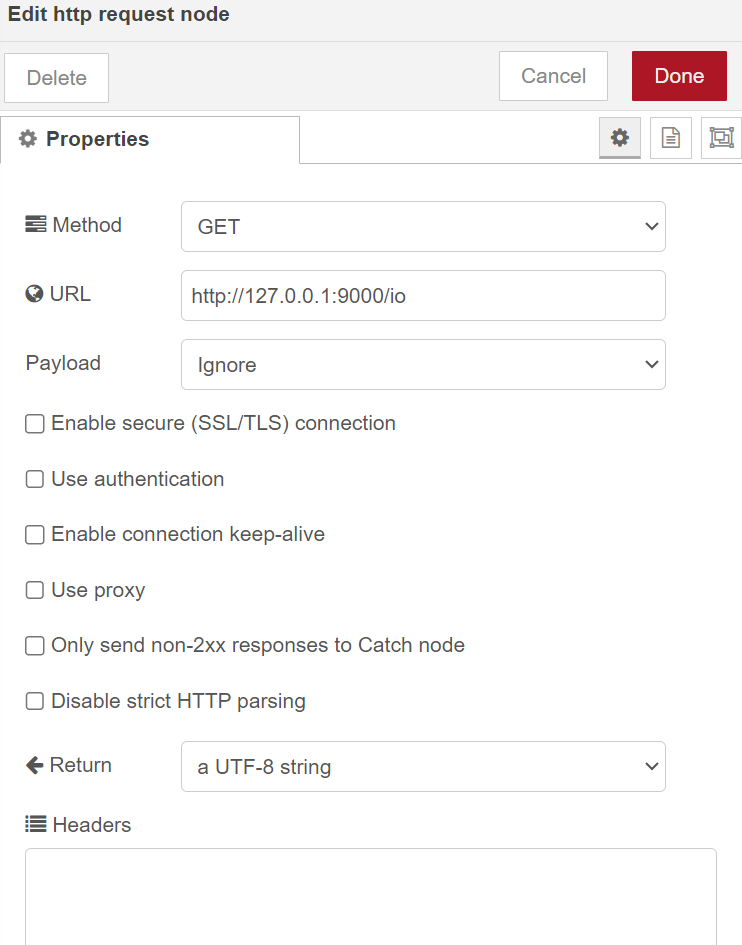
Next, we will use an HTTP Request node ![]() to send and return a response. Configure it as follows:
to send and return a response. Configure it as follows:
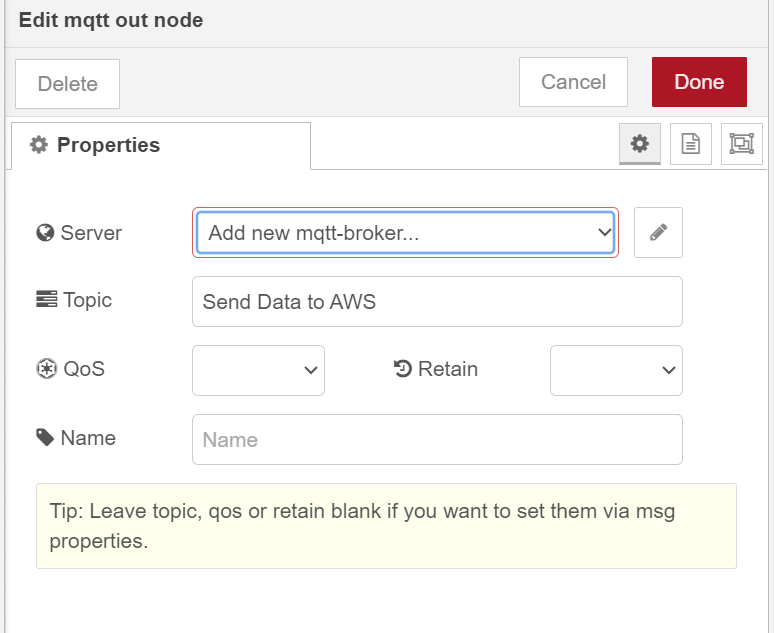
Now we will configure the MQTT output node ![]() to send data to AWS. Double-clicking on the node gives us options for the server name and topic.
to send data to AWS. Double-clicking on the node gives us options for the server name and topic.
On this menu leave the server name blank (we will add it to the next menu), “Qos” and “Retain” values should also be left as blank. Give it a topic name and then click on the pencil next to the server name for further configuration.
NB: The TCP port number is always set to 8883.
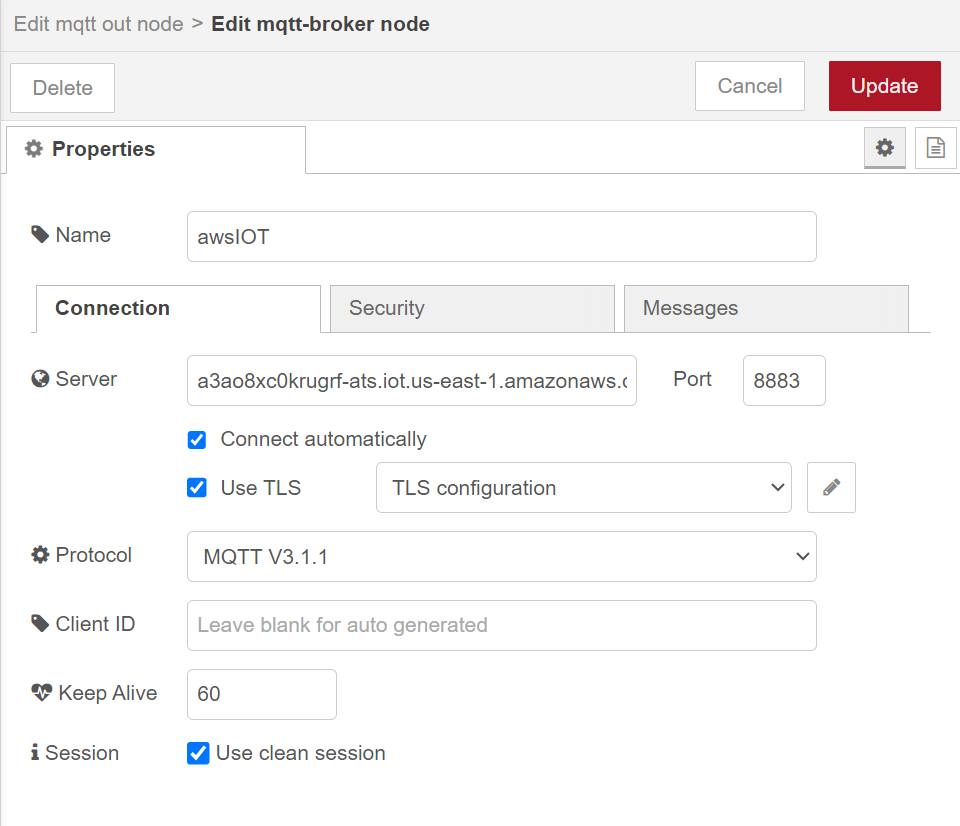
Give the node a name. The Server can be found by navigating to “settings” on the side panel on AWS at the bottom.
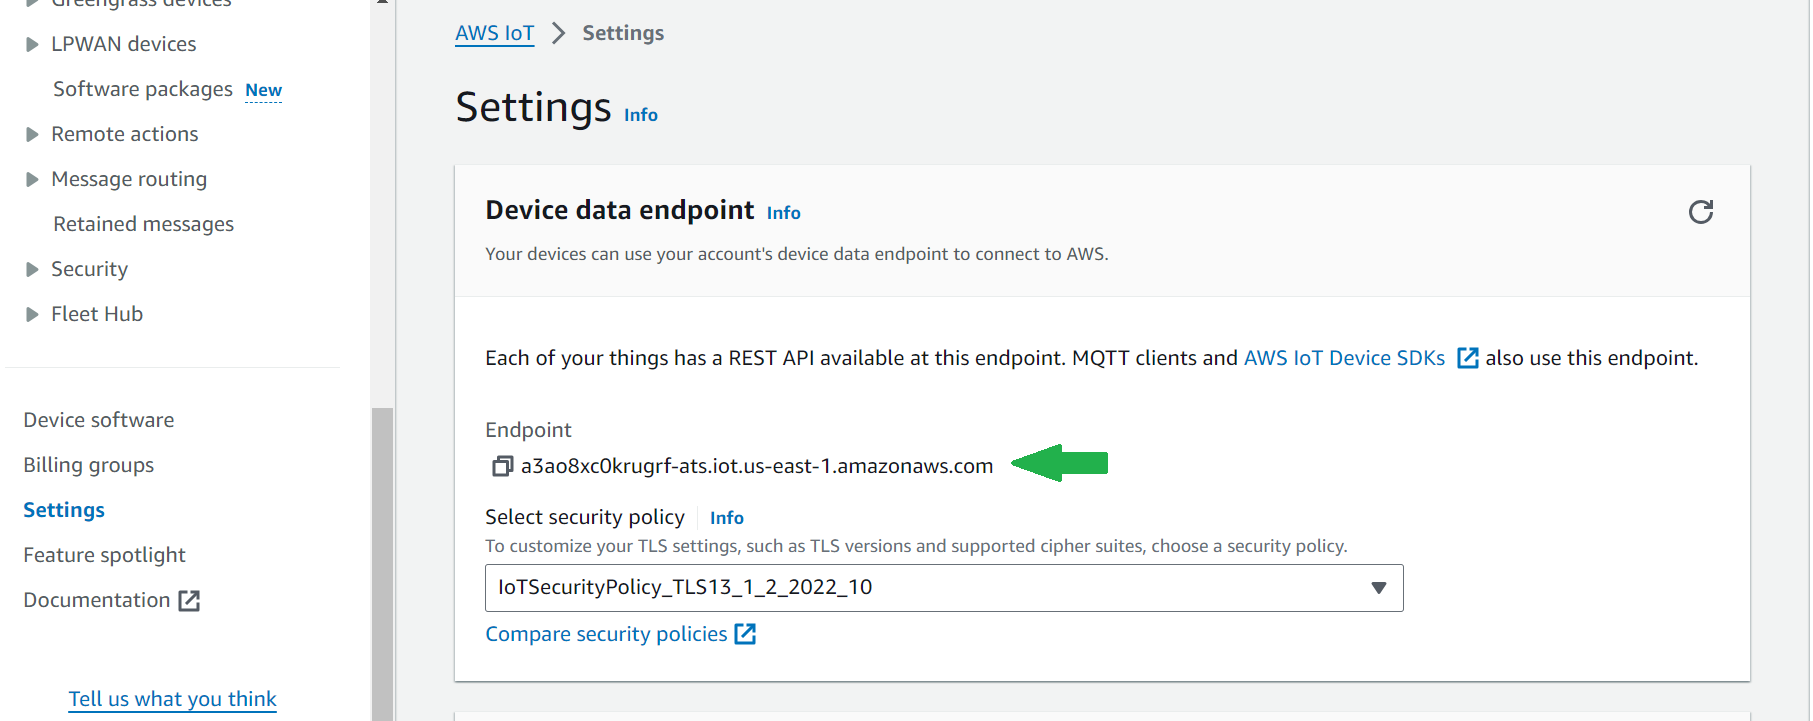
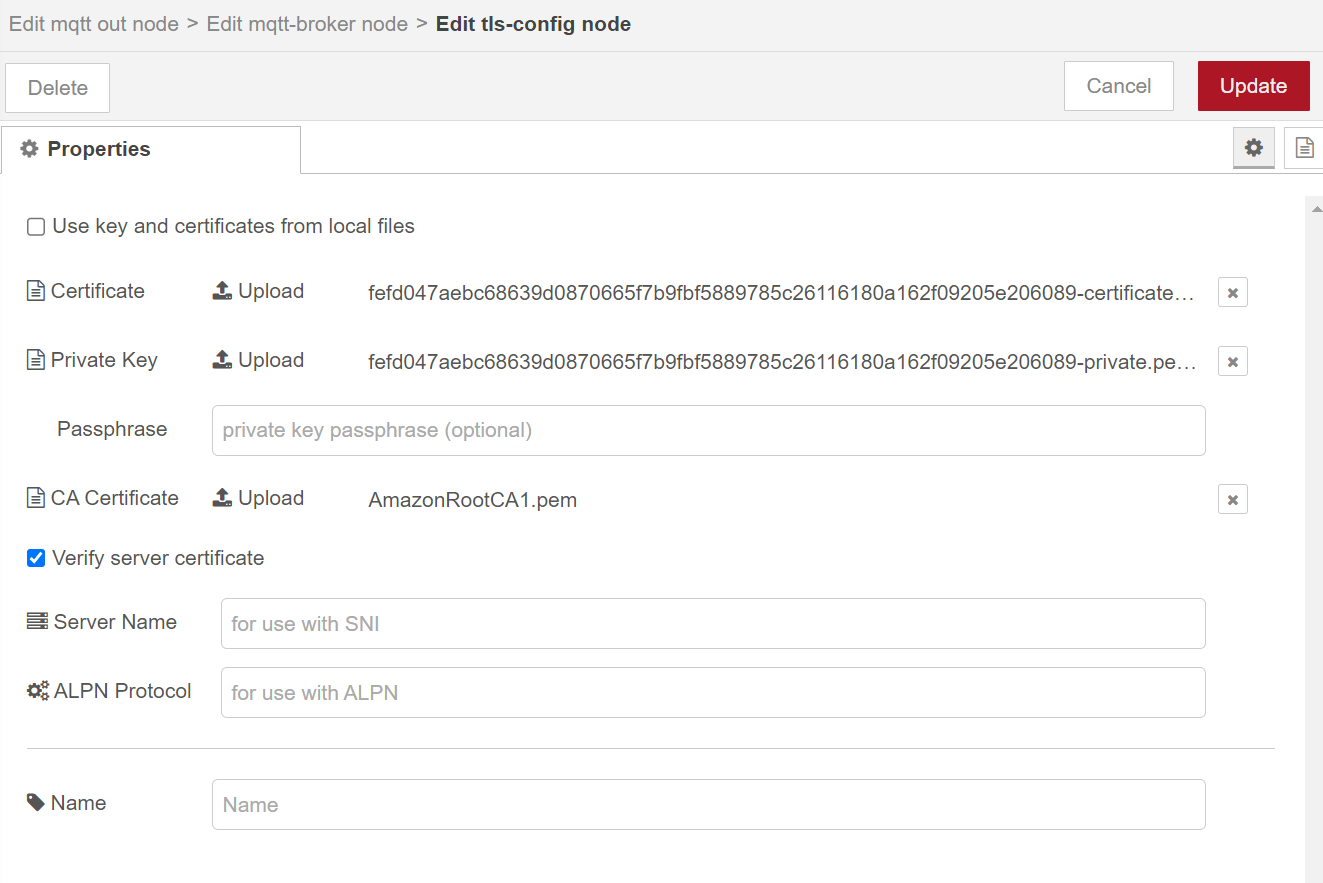
Copy the “Endpoint” and paste it as the server in Node-Red. Set the port number to “8883”, keep the client ID blank, and enable TLS connection. Click on the pencil to upload the certificates. Upload the device certificate, private key, and CA certificate that you downloaded earlier from AWS. Click “update” and the node is ready to connect to AWS.
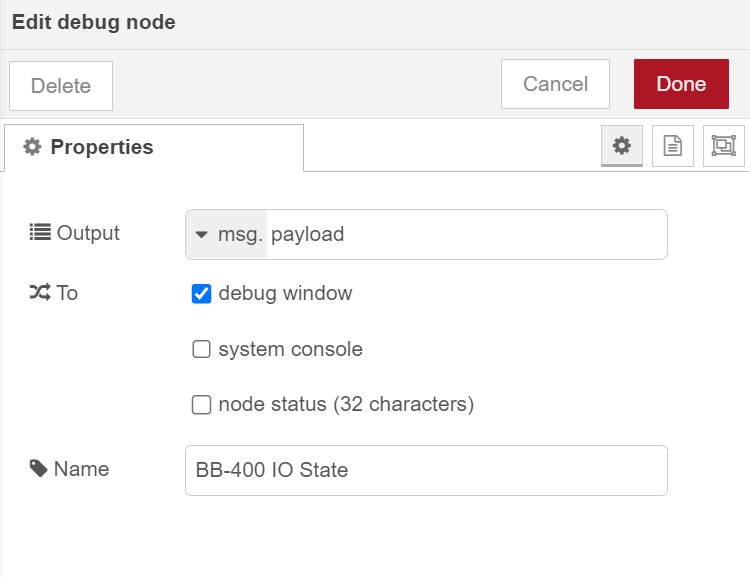
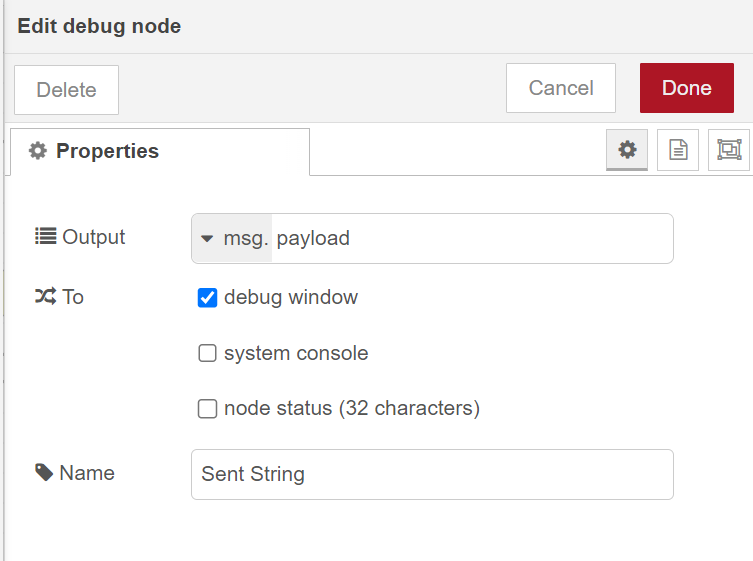
Finally, add a “debug node”. ![]() Give it a name and click “done”.
Give it a name and click “done”.
Connect each of the now configured nodes as shown below. The flow is ready to be deployed and you should be connected to AWS.

Sending BB-400 IO state from Node-Red to AWS
Navigate to IoT Core and click on “Test”. This can be done by navigating to the side pane → Test → MQTT test client.
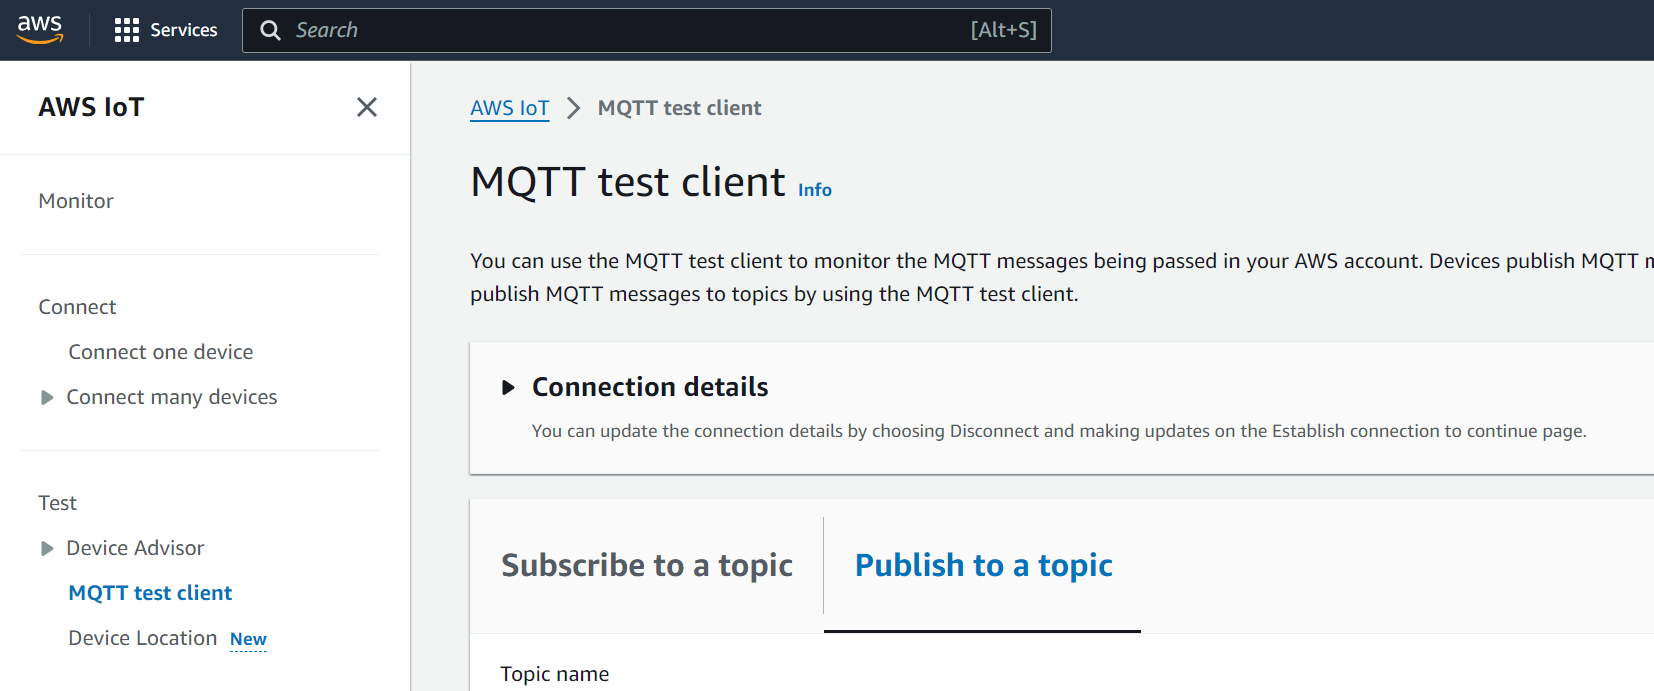
Enter in the “Subscribe to a topic”, the topic name you gave the MQTT out node in Node-Red. Click on “Subscribe” and you should see the IO status events being sent to the MQTT client after redeploying.
In Node-Red:
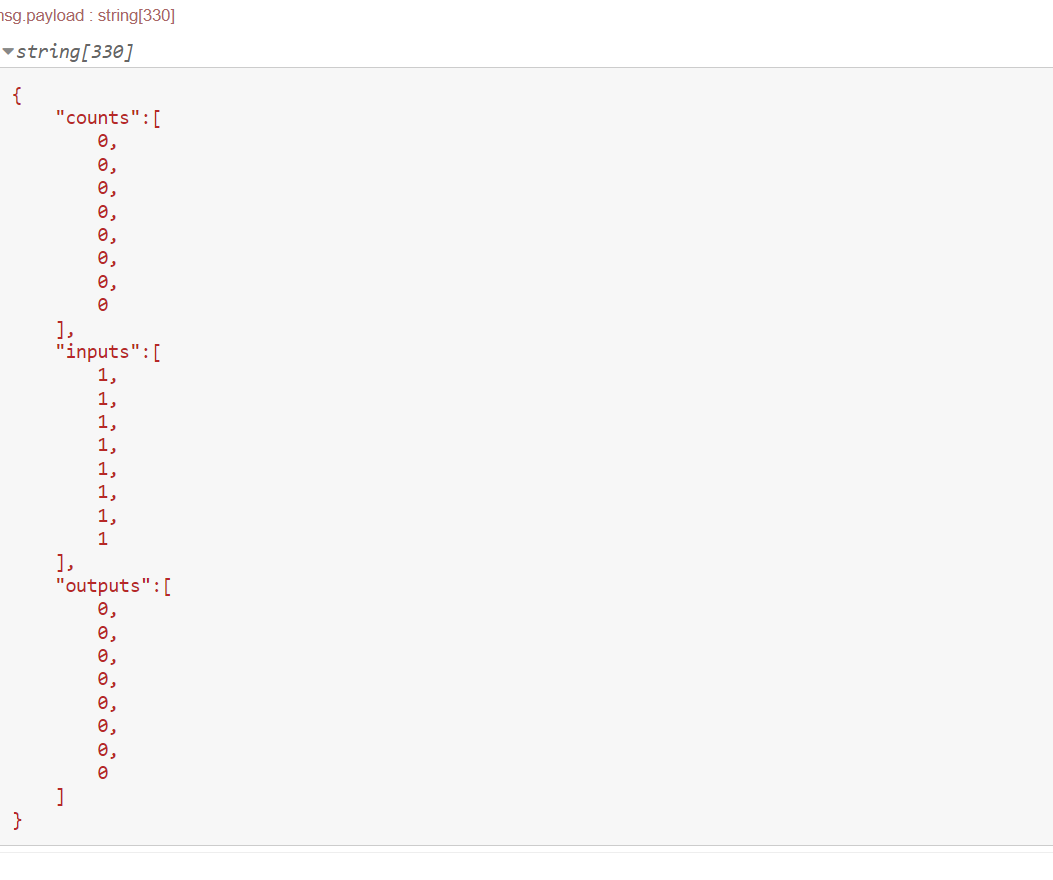
In AWS MQTT test client:
Send a message from AWS to Node-Red
You can also set up a flow to receive events from AWS.
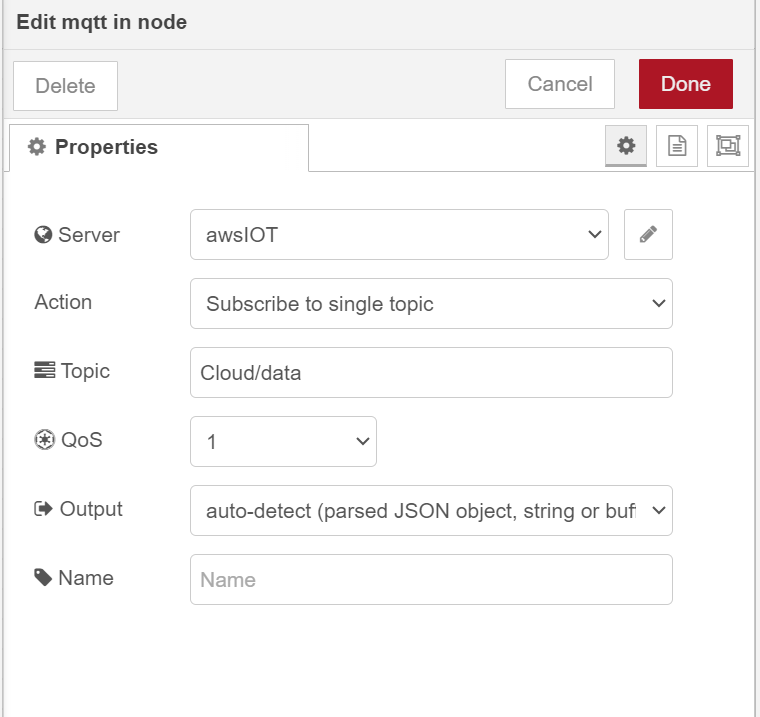
We will use a “MQTT input node” ![]() instead, and set it up with the same settings as before. Give it a Topic name. If you named your previous server, you should be able to click on this in the drop-down. We will use a debug node for the output.
instead, and set it up with the same settings as before. Give it a Topic name. If you named your previous server, you should be able to click on this in the drop-down. We will use a debug node for the output.
Node-Red flow:

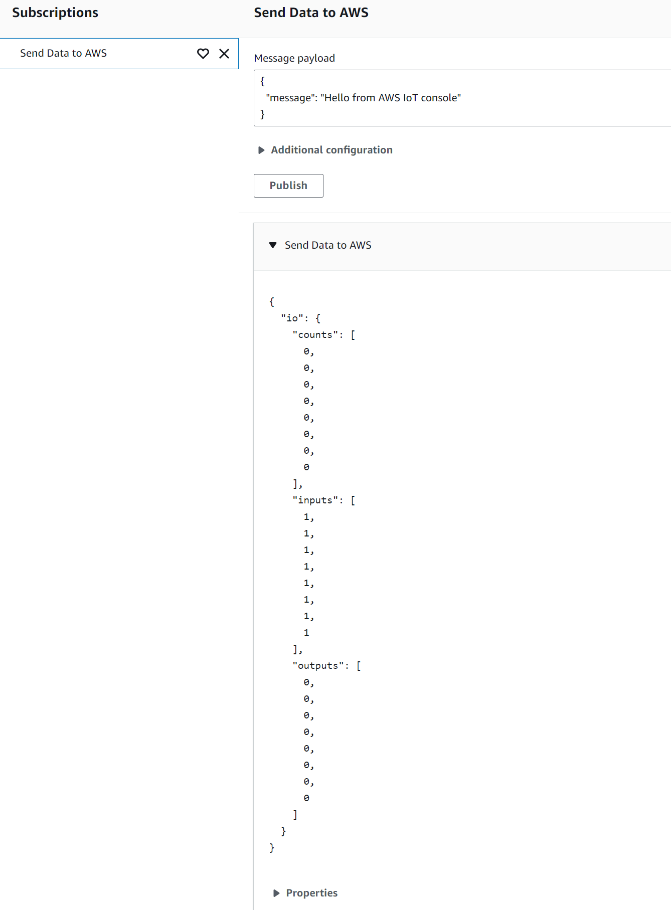
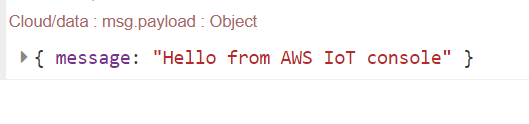
Heading back to AWS MQTT client, click “Publish to a topic” → Enter the topic name you gave the MQTT in Node-Red. In the message payload, edit the message to your liking → click on “Publish”.
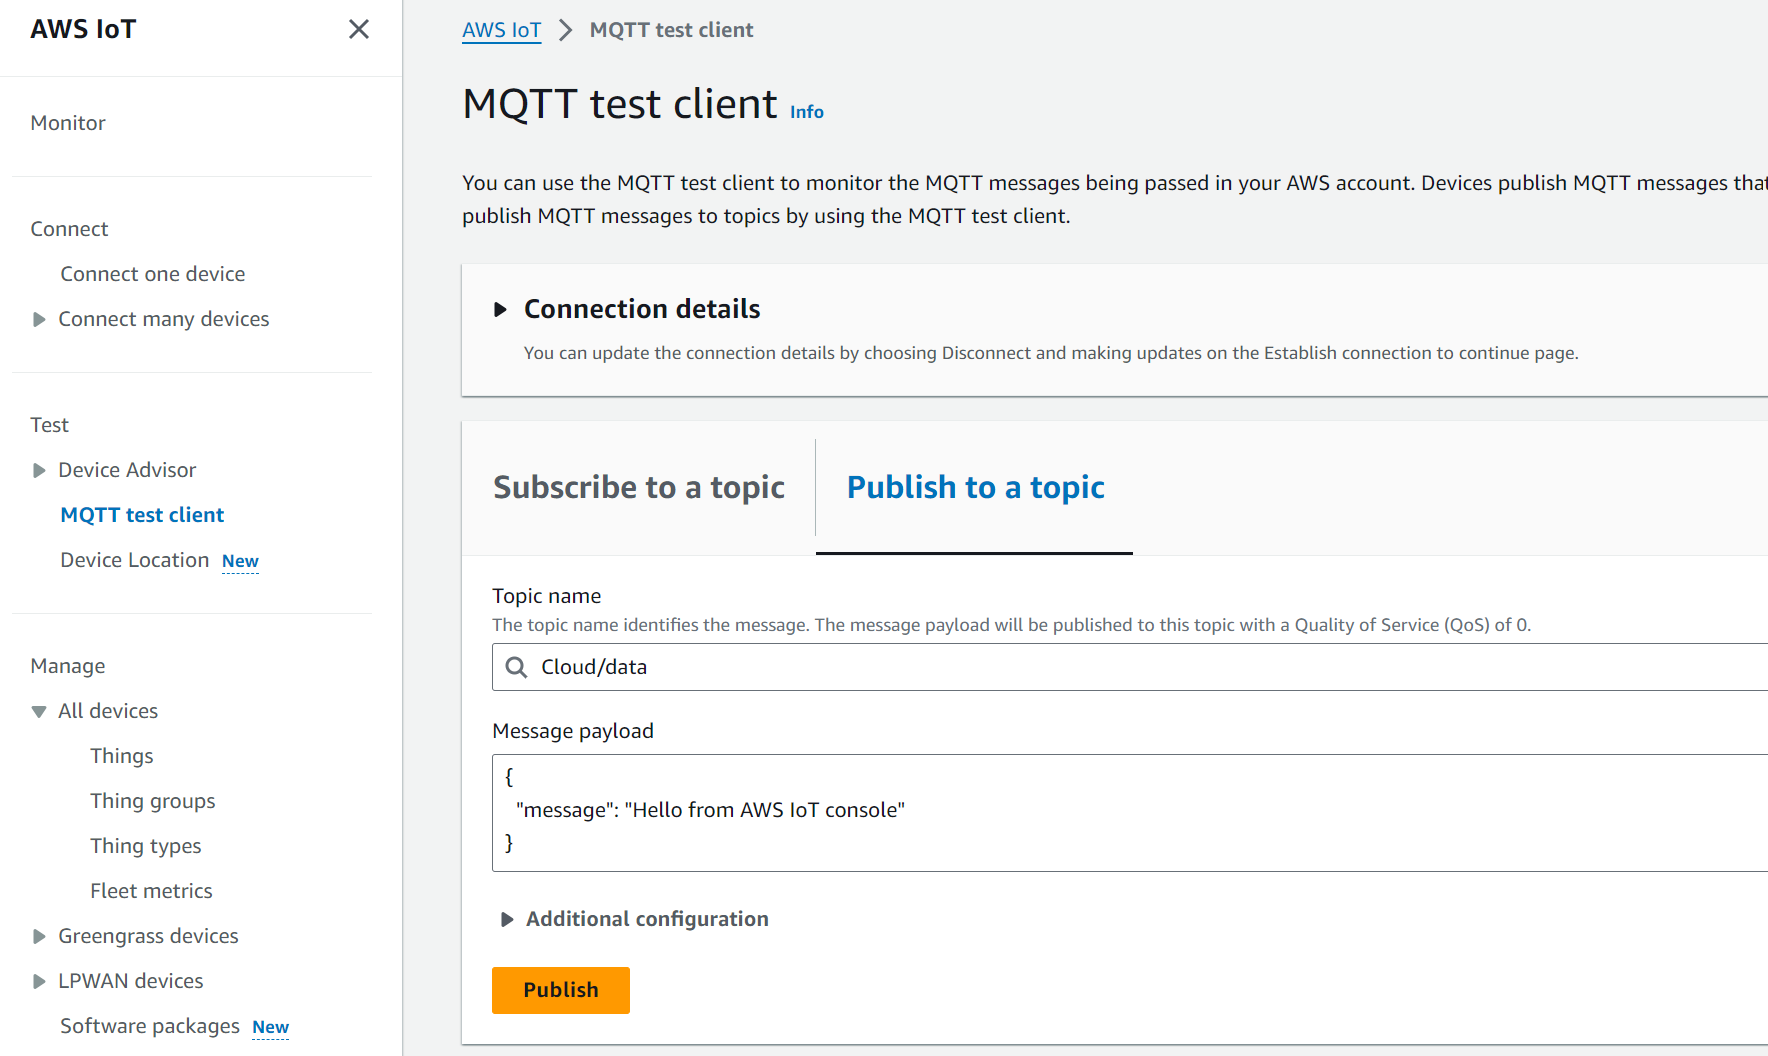
You should be able to see the message (“Hello from AWS IoT console”, in this case) in the debug message in Node-Red:
Sending serial data to the cloud.
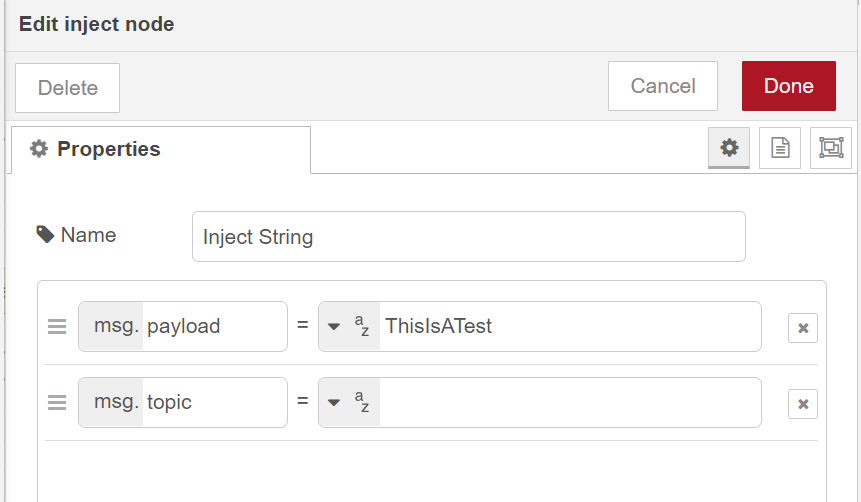
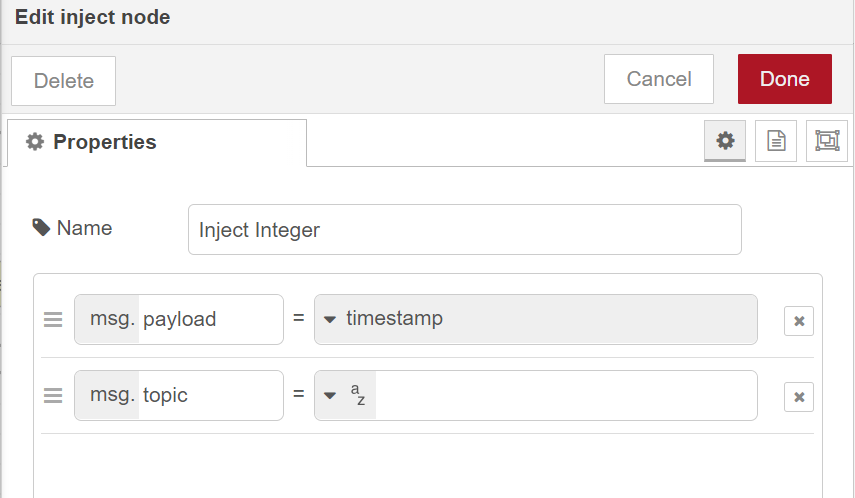
The example below demonstrates using one of our ES-511 devices to send serial data to AWS. We’ll start by using an “inject node” to send a string and another to send an integer. Configure the nodes as follows:
String Inject Node:
Integer Inject Node:
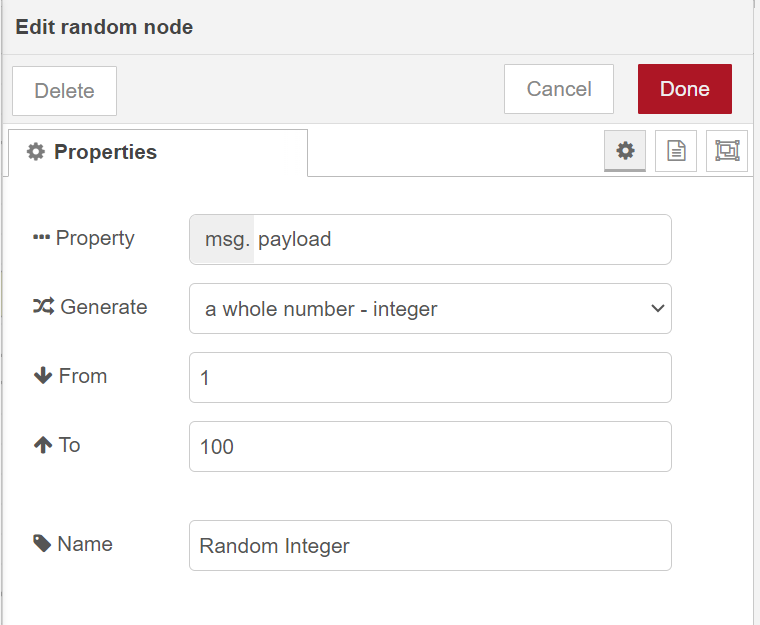
Next, we’ll use a “random” node  to generate an integer between 1 and 100. Configure it as follows:
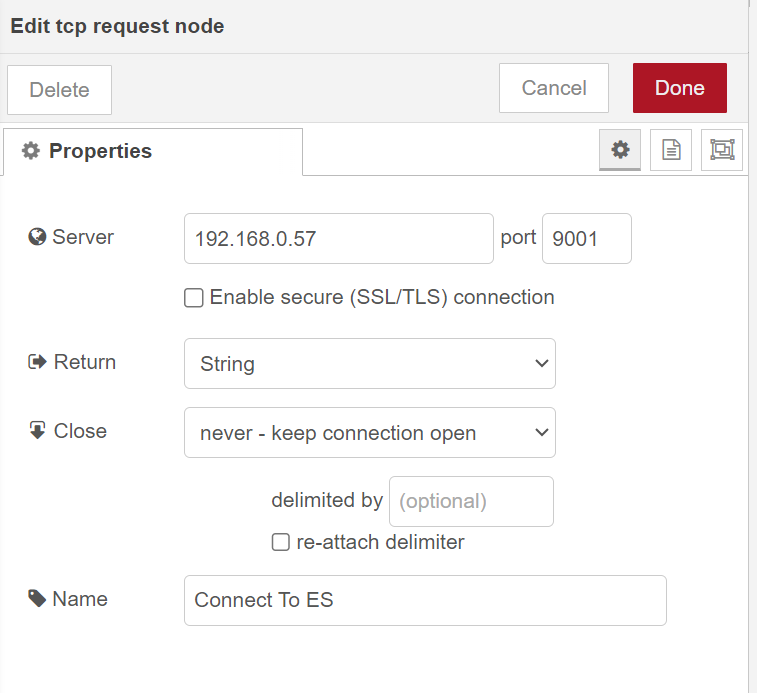
Configure the “TCP request” node as shown below. Ensure your ES device is set to RawTCP and has a physical loopback on the serial port. The “Server” is the IP address of your ES device.
Configuring a loopback test:
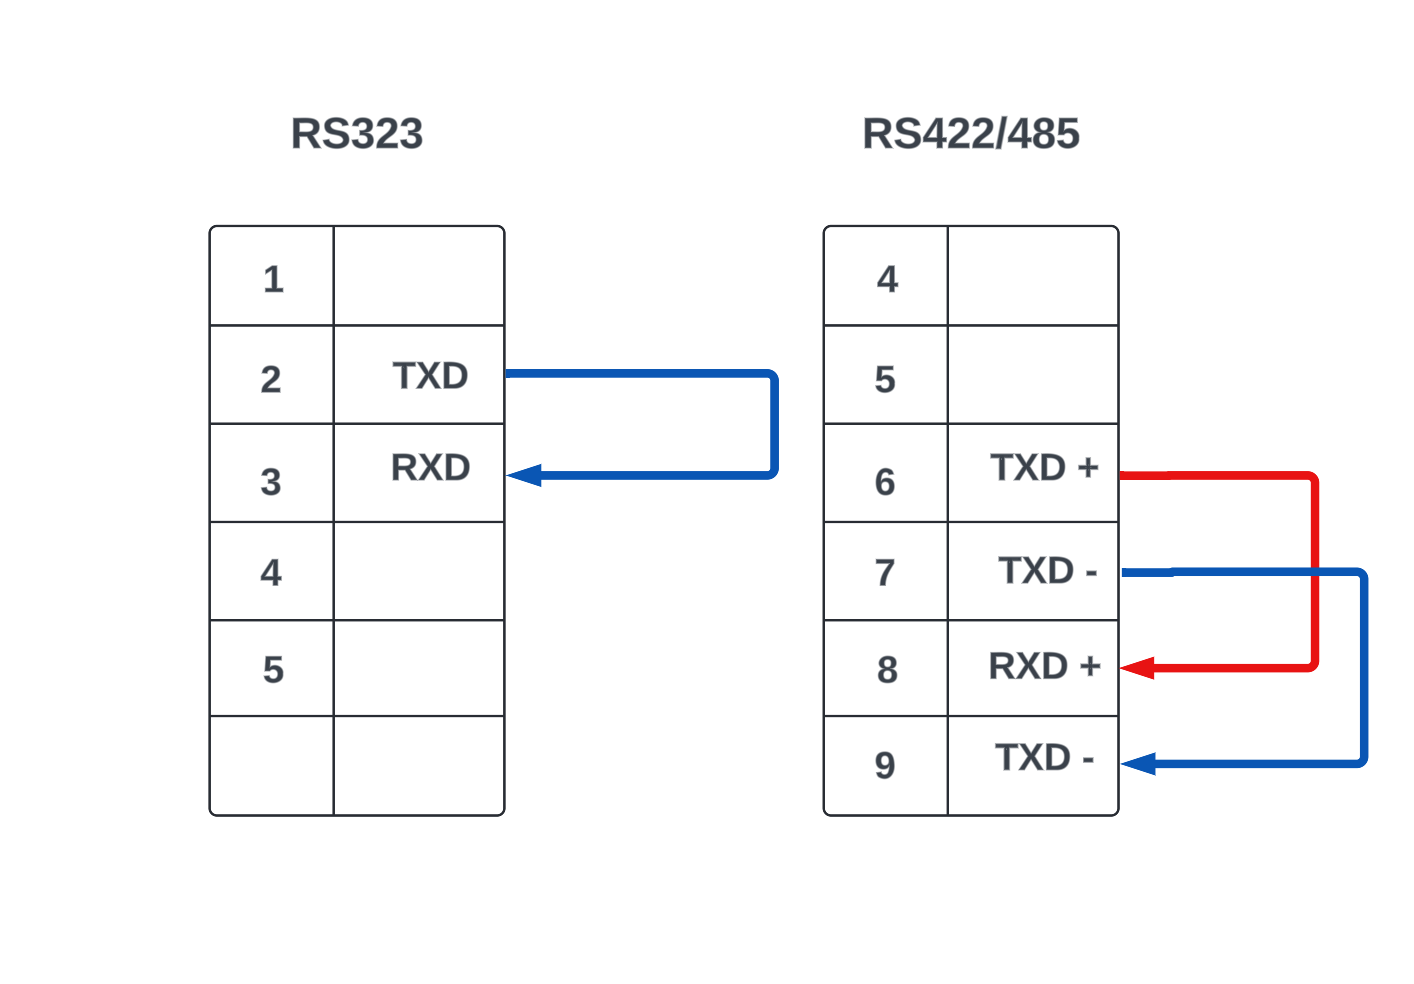
Please note for RS422/485 pins out may vary.
We’ll configure three debug nodes to monitor the sent string, sent integer, and received payload. Name them respectively.
Example of sent string debug node:
Now make a copy of the “MQTT Out node” used previously and integrate it into the flow as shown below:
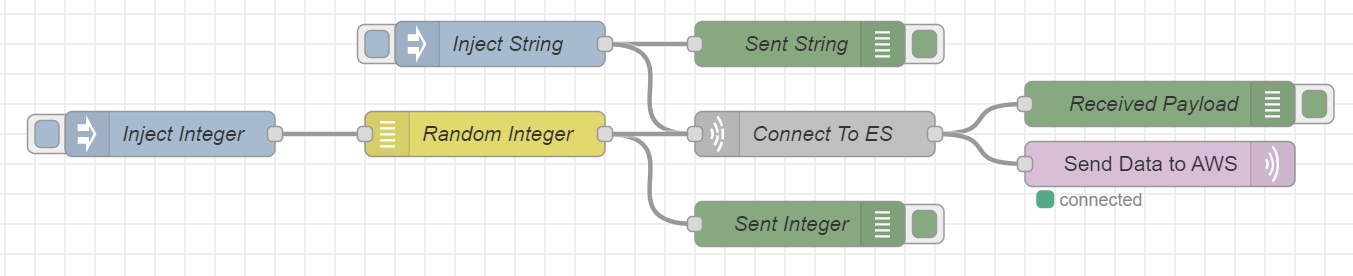
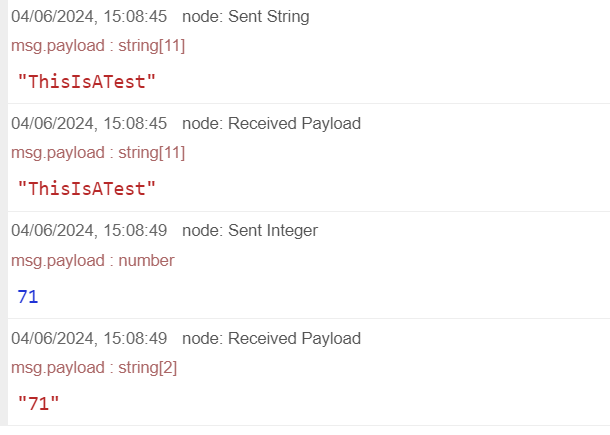
After triggering the inject nodes, the expected output is as follows:
Node-Red:
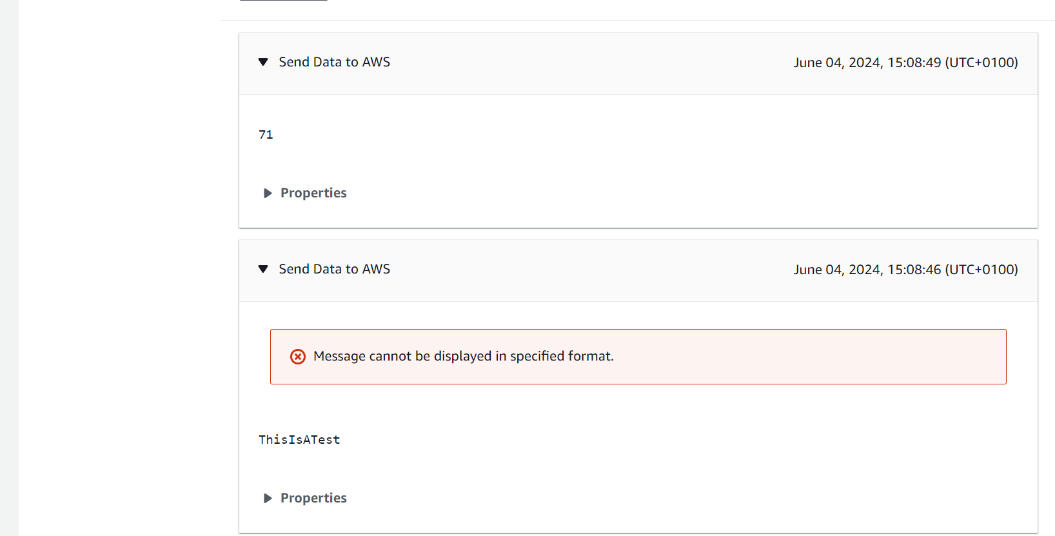
AWS:
Sending IO state to the cloud
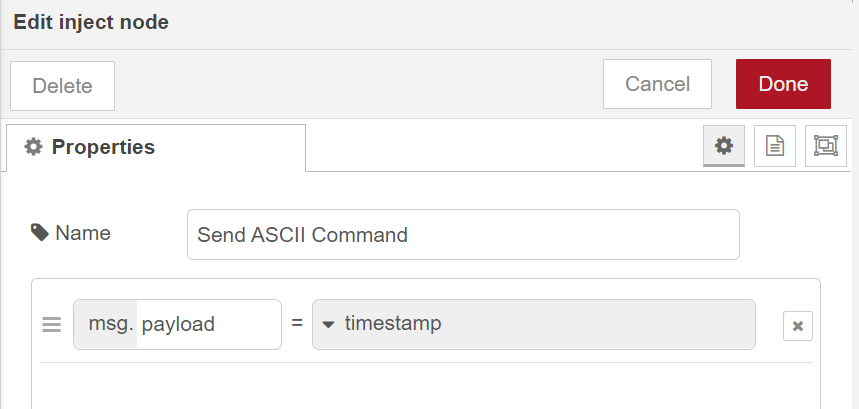
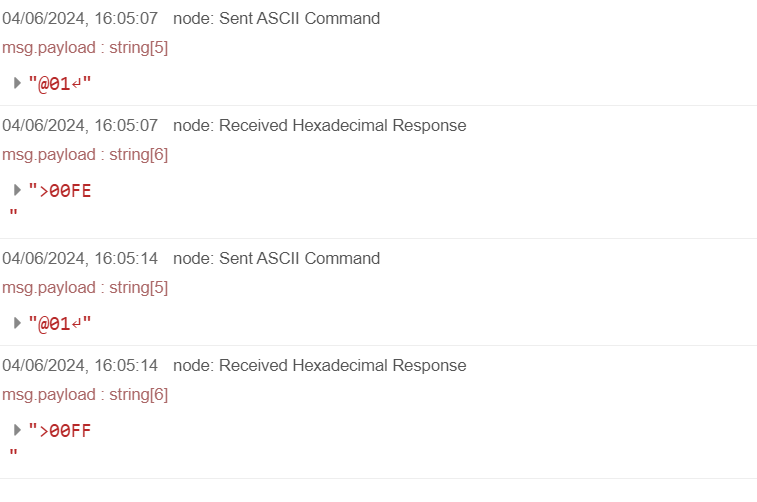
In this example, we’re generating an ASCII command from within Node-Red, passing it to an ED device, and sending the ED’s response to the cloud. Configure the nodes as follows:
Inject Node:
NB: the repeat interval can be adjusted to your preference.
Function Node:

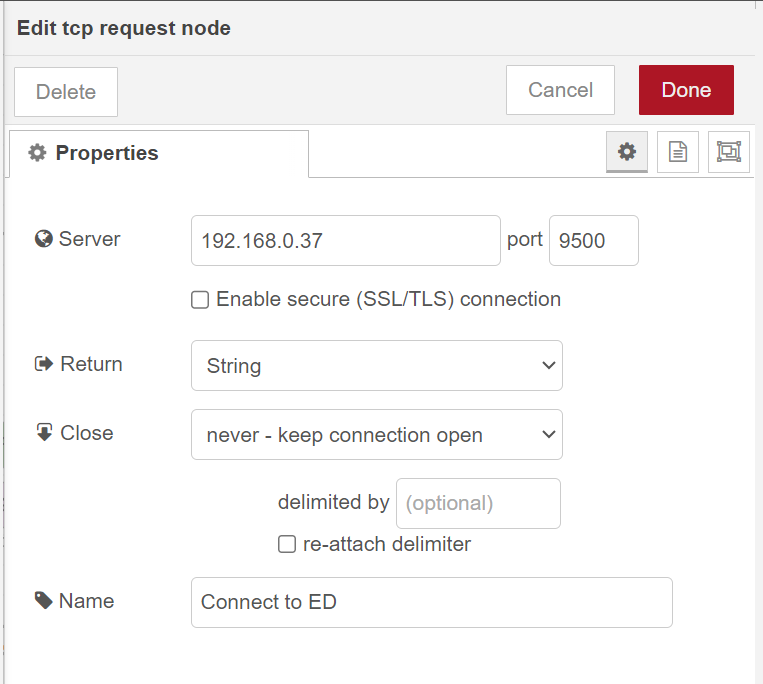
TCP Request Node:
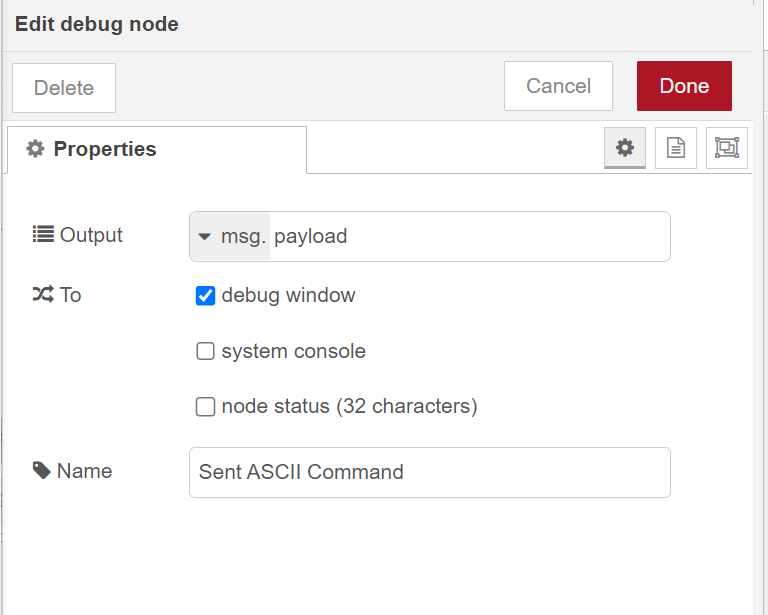
Sent ASCII Debug Node:
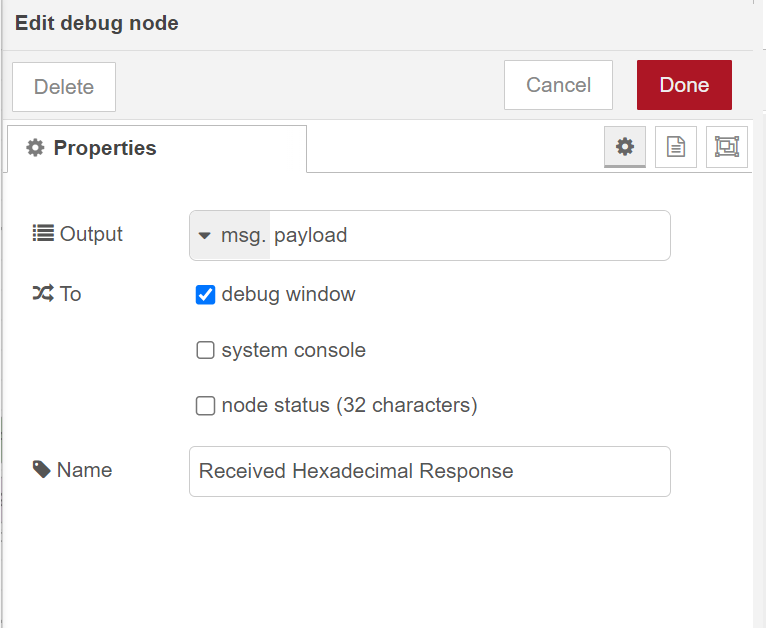
Received Hexadecimal Response debug node:
Join the nodes as shown below:

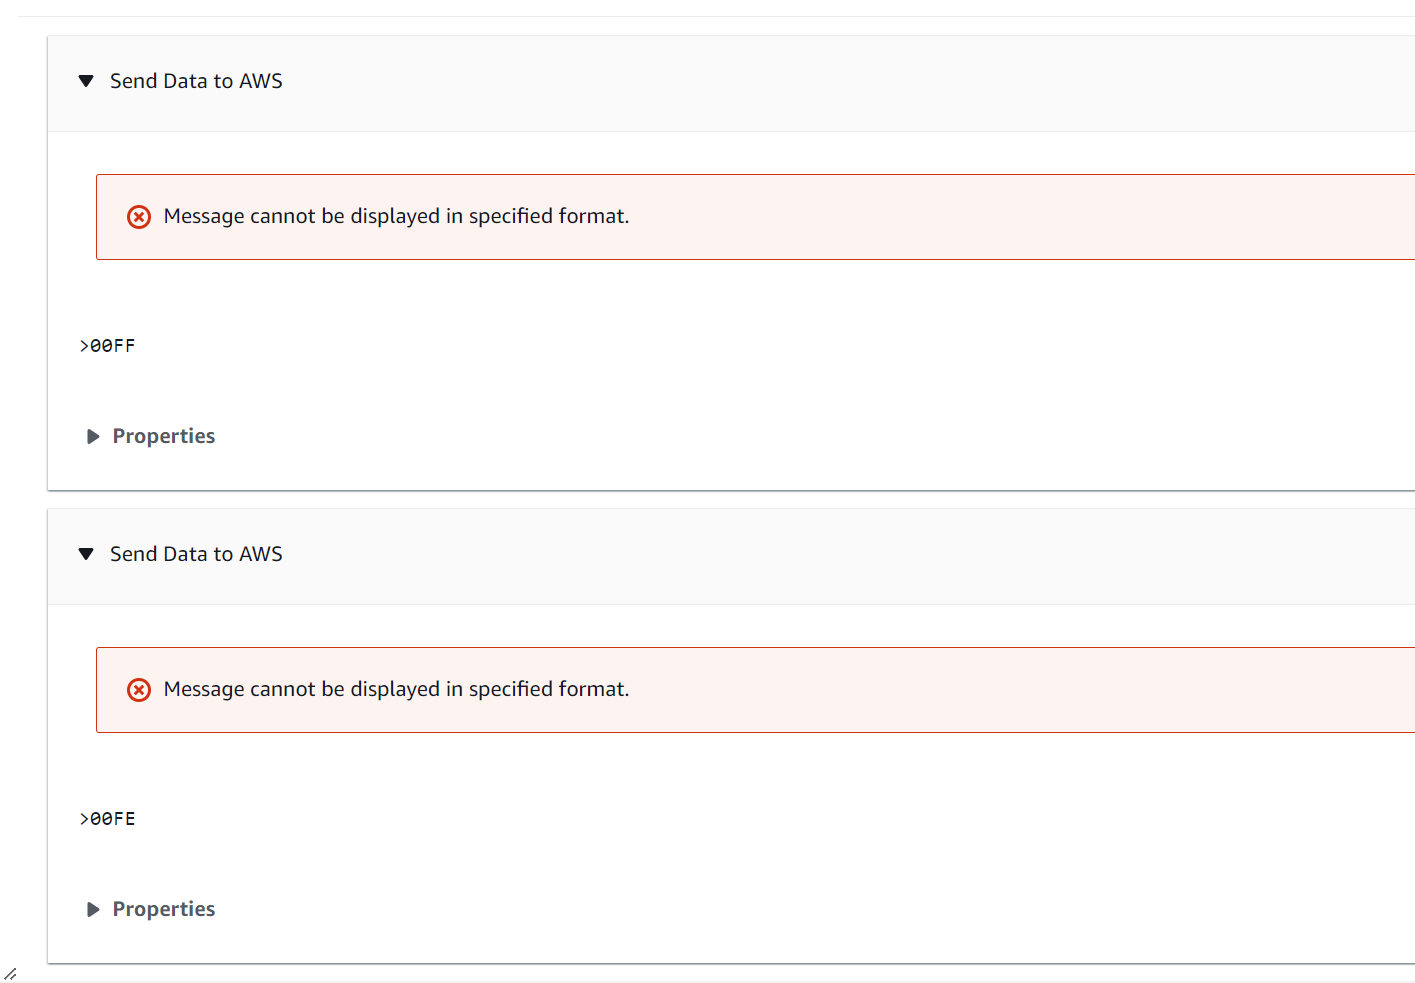
Examples of output expected after triggering the inject node:
Node-Red:
AWS:
In this FAQ we have explained how to create an AWS account, connect your device to AWS, configure certificates and a policy, and finally how to setup Node-RED to send and receive the BB-400’s IO status.
FAQs