FAQs
Brainboxes Ethernet to DIO Devices have a feature called I/O tunnelling. I/O tunnelling connects two devices together to create an I/O tunnel which extends the Digital IO link over an Ethernet connection. When the Digital I/O data is sent, it is converted to Ethernet packets by one Ethernet to DIO device, and then transmitted over the network, then unpacked and converted back to I/O data by the other Ethernet to DIO device.
IO Tunnelling is only supported on the following products:
- ED-038
- ED-516
- ED-527
- ED-538
- ED-588
An example of tunnelling is shown in the diagram below:

I/O tunnelling is set up using the webpage interface. In the following instructions there are two devices. The local side is the device that you are connecting from, and the remote side is the device you are connecting to. However, it doesn’t matter which device is used to set up the tunnel as the settings entered on the local side are always mirrored on the remote device.
- Go to the web page interface of the Local ED Device using a web browser
- Navigate to the Protocol page of the ED device
- At the bottom of this web page is the I/O tunnelling section
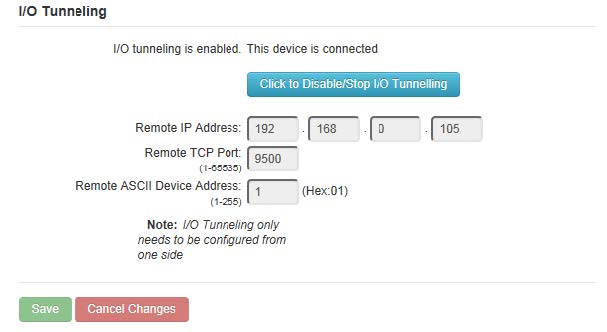
- To connect tunnelling, tick the enable box and enter the Remote IP Address and Remote TCP Port number of the Remote ED device you want to connect to and click ‘Save’:
.jpg)
- When the I/O tunnelling is established, you will see the confirmation of the connection:

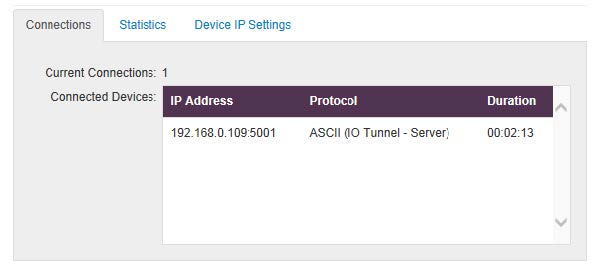
- You will also be able to see the following in the device Web configuration home page:

- You can disable/enable the I/O Tunnelling from either the local device side or the remote device side in the Protocol page by clicking the blue button.
