June 13, 2016 / News
Contents
An introduction to Serial tunnelling; what is it and how can you use it?
1.What is serial tunnelling?
Serial Tunnelling is a method of connecting two serial devices through a
network. By using an Ethernet you can extend the distance between the Serial
devices beyond the limits of cabling to across the world. The tunnelling set up
allows the two serial devices be connected as if they were next to each other,
meaning that no intelligent intermediary device, such as a PC, is needed.

The benefits of this are that cable length, physical onsite restrictions
or location are not a barrier. It also means that no additional PC, PLC or
other control equipment needs to be purchased or maintained. Here is a typical serial tunnelling application between a camera, which could be installed high up on a remote site, and a joystick controller.
When serial data is sent it is converted to Ethernet packets by one
Ethernet to Serial device, transmitted over the network, then unpacked and
converted back to serial data by the other Ethernet to Serial device.
The range of Brainboxes’ products you can use for Serial Tunnelling are
the ES devices. These include 1, 2, 4 & 8 port devices, RS232/422/485 and
Power over Ethernet. Look for any part code starting ‘ES’.
2. Can I use any ES device to
tunnel?
Yes, every Brainboxes Ethernet to serial (ES) device has the serial
tunnelling feature built in. You do not need to have the same device at one end
as at the other, for example you could have an ES-551 with industrial
temperature range and galvanic isolation in one location tunnelling to a
desktop ES-257 at another.
3. How do I know when to use this
feature?
The key problem it solves is distance. The data rate of the serial connection determines the maximum distance the serial data can travel over cabling.
The maximum RS-232 serial cable
length is typically 50 feet (15m). Even in a relatively small factory this
distance is restrictive. Whilst RS-422/485
has a much further max distance of 3,000 ft (1,000m) as soon as you are dealing
with remote locations or multiple sites this will not be enough. This is where
serial tunnelling comes in.
Serial tunnelling allows the user to set up a network connection which
can span any distance, up to 40,000km/25,000 miles (the circumference of
Earth). This can benefit many customers and businesses as they can save money
on cabling or link devices far apart and still have a stable Serial connection.
4. Do I need to use tunnelling on
all ports at once on the Brainboxes Ethernet to Serial device?
No, tunnelling is set up on a ‘per port’ basis; each port is
individually configured. This is so you can tunnel one or more of the ports at
the same time when using a Brainboxes ES device. Any port can tunnel to any
location. In addition, you can use Brainboxes virtual com port on a windows PC
to another port.
5. Can I convert between protocols
when using serial tunnelling?
Yes, you can convert from RS-232 to RS-422/RS-485, or vice versa. Keep
in mind if you are using RS-485 half duplex you will have to transmit under the
rules of half-duplex RS-485 (transmitting data one-way at a time). You would
also need the baud rate to be the same.
Baud rates must be the same when there is no handshaking (e.g. RTS/CTS,
DTR/DSR), when handshaking is used baud rates can be different at each end of
the tunnel.
6. Is serial tunnelling easy to set
up?
Yes, serial tunnelling is easy to set up. There is an in-depth
step-by-step guide explaining how to set this feature up in the answer below.
This guide is designed to help both the tech savvy user and less experienced
user.
7. How do I set up serial
tunnelling?
- Open the
web configuration page of the local Brainboxes ES device using the web browser. - Navigate
to the page of the serial port you want to use to tunnel. - At the
bottom of this webpage you will find the device tunnelling section. -
To connect
tunnelling tick the “Enable” checkbox. Enter the Remote IP Address and Remote
TCP port number of the ES device you want to connect to.
Note that although serial
tunnelling is a two-way communication (there is no master device), you only
need to enter configuration settings on one device. - Click the
‘Apply Changes’ button and you will be taken to a page which will display a
success page. You will be redirected to the port page after the countdown timer
has finished. - The devices
will now be in tunnelling mode. - On the
local device port webpage you will see the device tunnelling section with two
buttons, ‘Disconnect’ and ‘Stop Tunnelling’. The ‘Stop Tunnelling’ button will
disconnect the ports on the remote and local side and put both devices into an
idle state. If the ‘Disconnect’ button is clicked the remote side port will be
disconnected and go into the idle state, but the local side will remain in
tunnelling mode. - On the
remote device web configuration page, the serial port that is tunnelling will
show that the port is connected. - In
Boost.LAN Manager, the symbol in the image below will be displayed when a
device is connected in tunnelling mode.


-
ES-246
$126.23 Add to cart

-
ES-842
$746.90 Add to cart

-
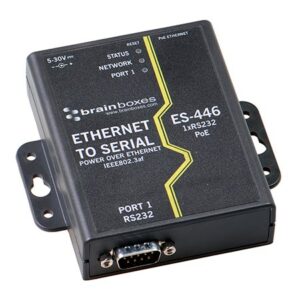
ES-446
$170.50 Add to cart
-
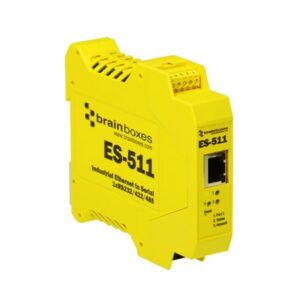
ES-511
$348.70 Add to cart