FAQs
Contents
Cloud computing is the process by which information can be sent over the internet using a variety of different “pay-as-you-go” services. The BB-400 has a number of cloud services integrated, and this FAQ will explore one of these options: Amazon Web Services. For more information regarding the other cloud services please refer to the FAQ What Cloud services are available on the BB-400?
In this FAQ we will explain how to create a Amazon Web Services (AWS) account, and how to setup your BB-400 Node-RED instance to send the IO status to AWS, as well as showing how AWS can send data to the BB-400.
What is AWS?
AWS is a cloud service provided by Amazon. AWS includes a IoT Core that allows you to connect your devices to AWS, and also MQTT client connection to connect Node-RED to AWS. As Node-RED is already set up on the BB-400 by default, AWS is a great method in which to connect your device to the cloud.
Create your AWS account
The first step is to create your AWS account.
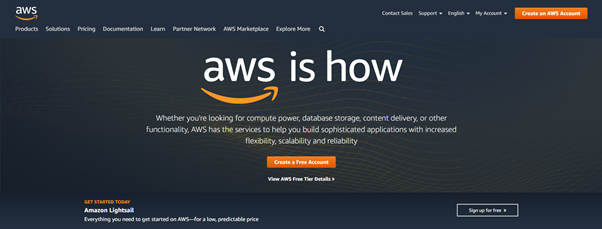
Go to https://aws.amazon.com/ and click on “Create a Free Account”:
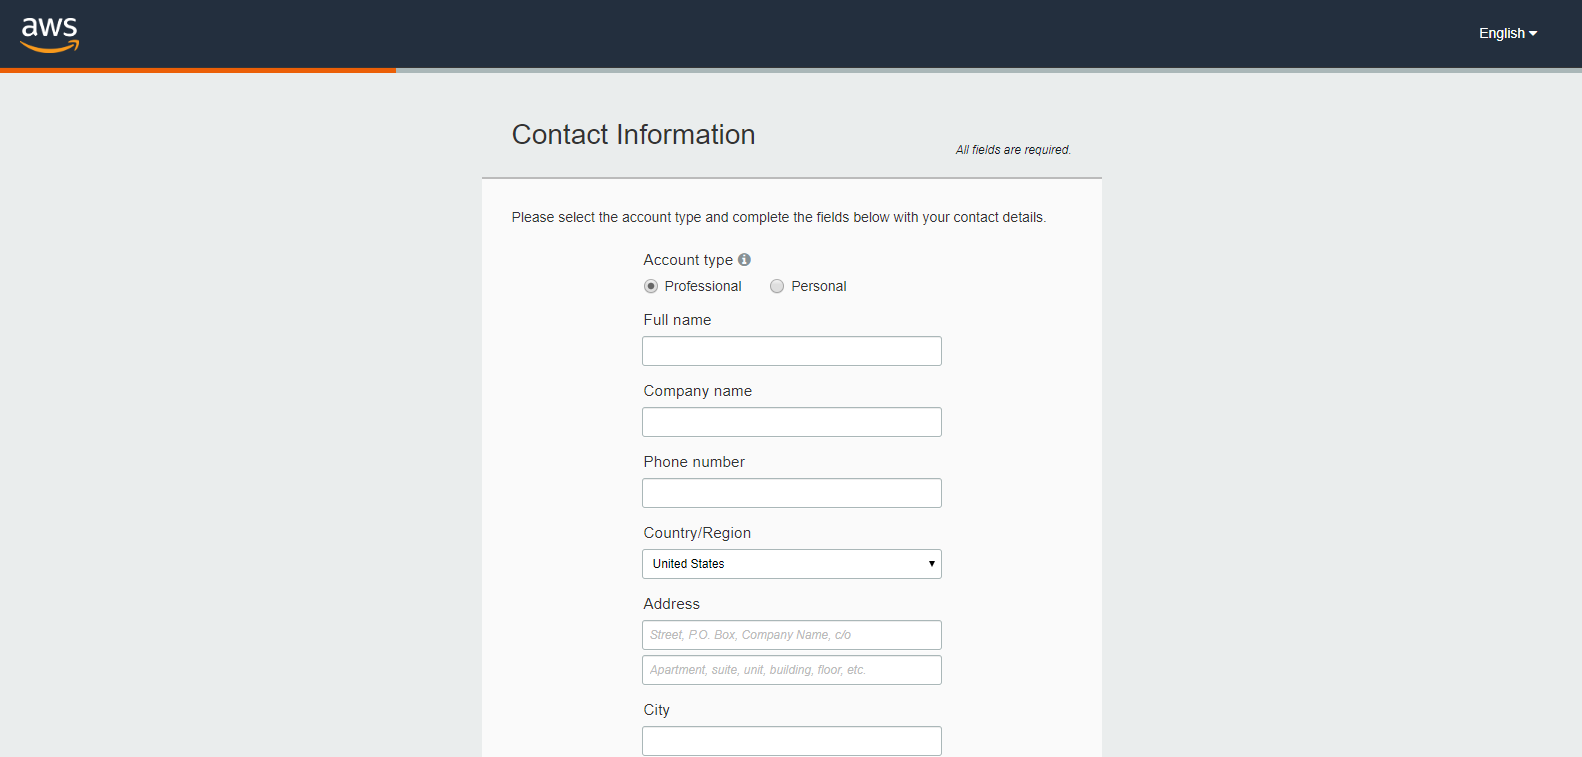
Fill in your details:
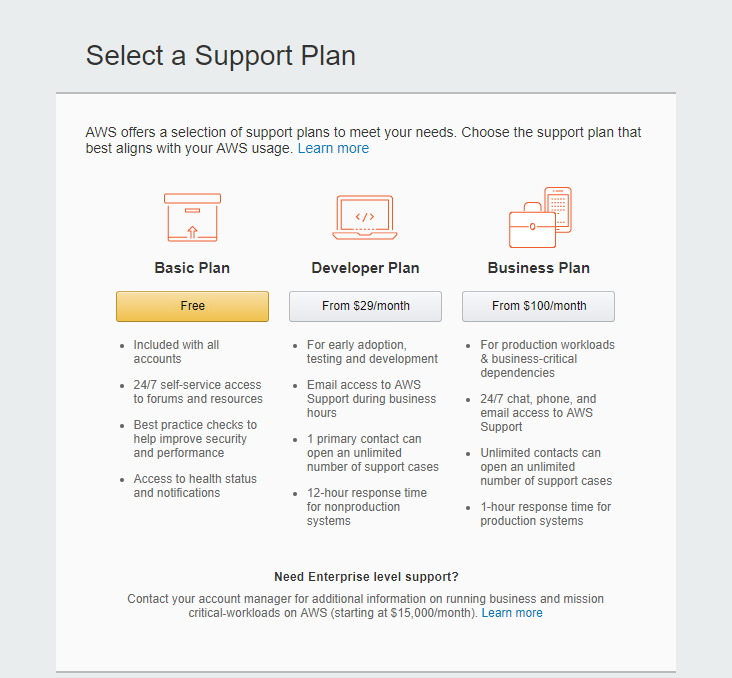
select a support plan:
and wait for activation: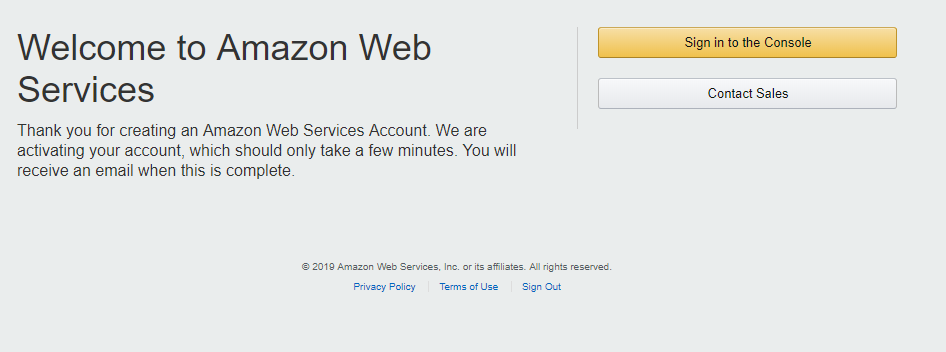
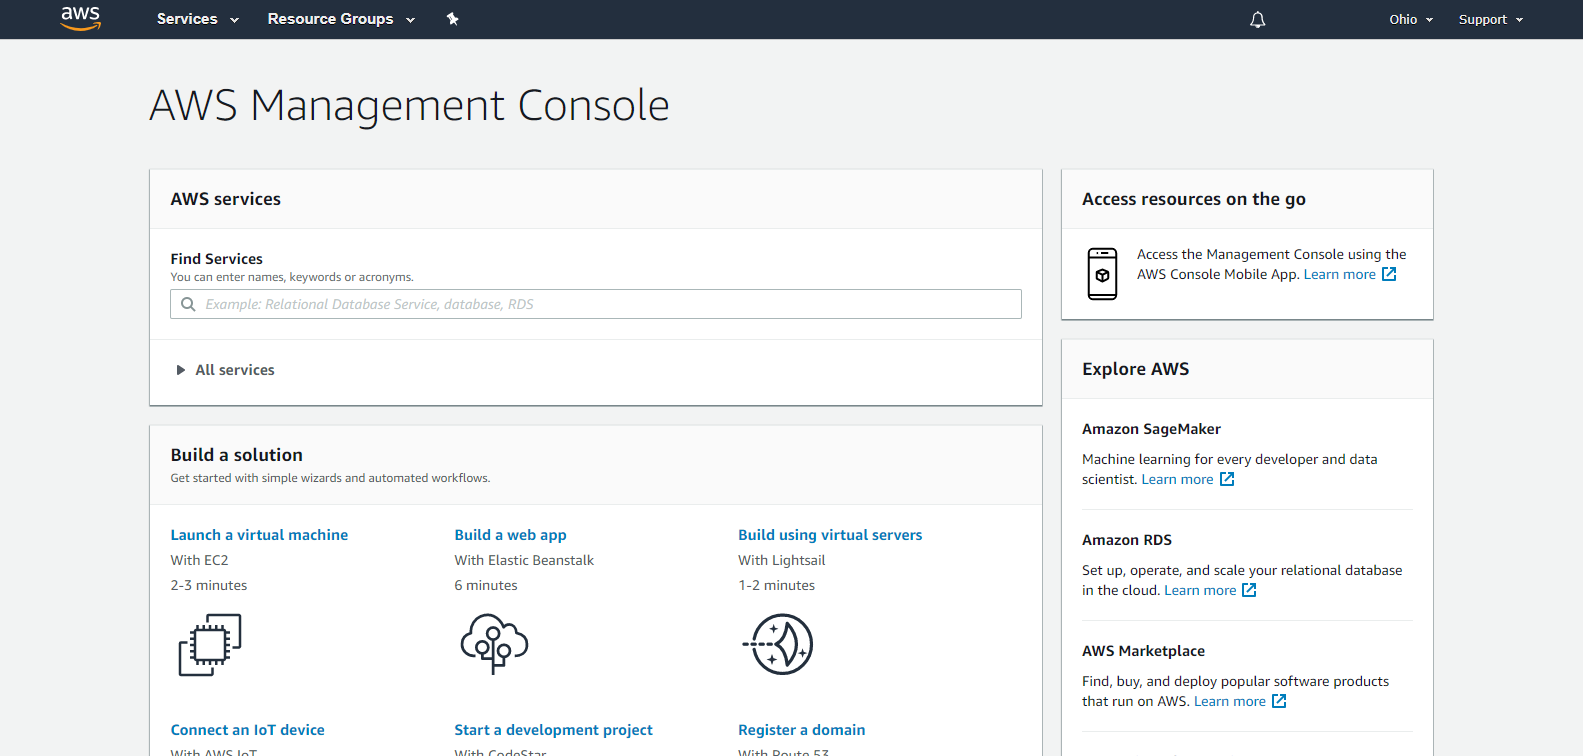
Once registered. and logged in, you will be presented with the AWS Management Console:
Register a device
Now that we have created our AWS account we are ready to register our device.
Click on IoT Core ![]() , then on the side panel click on Manage, Things and create:
, then on the side panel click on Manage, Things and create: 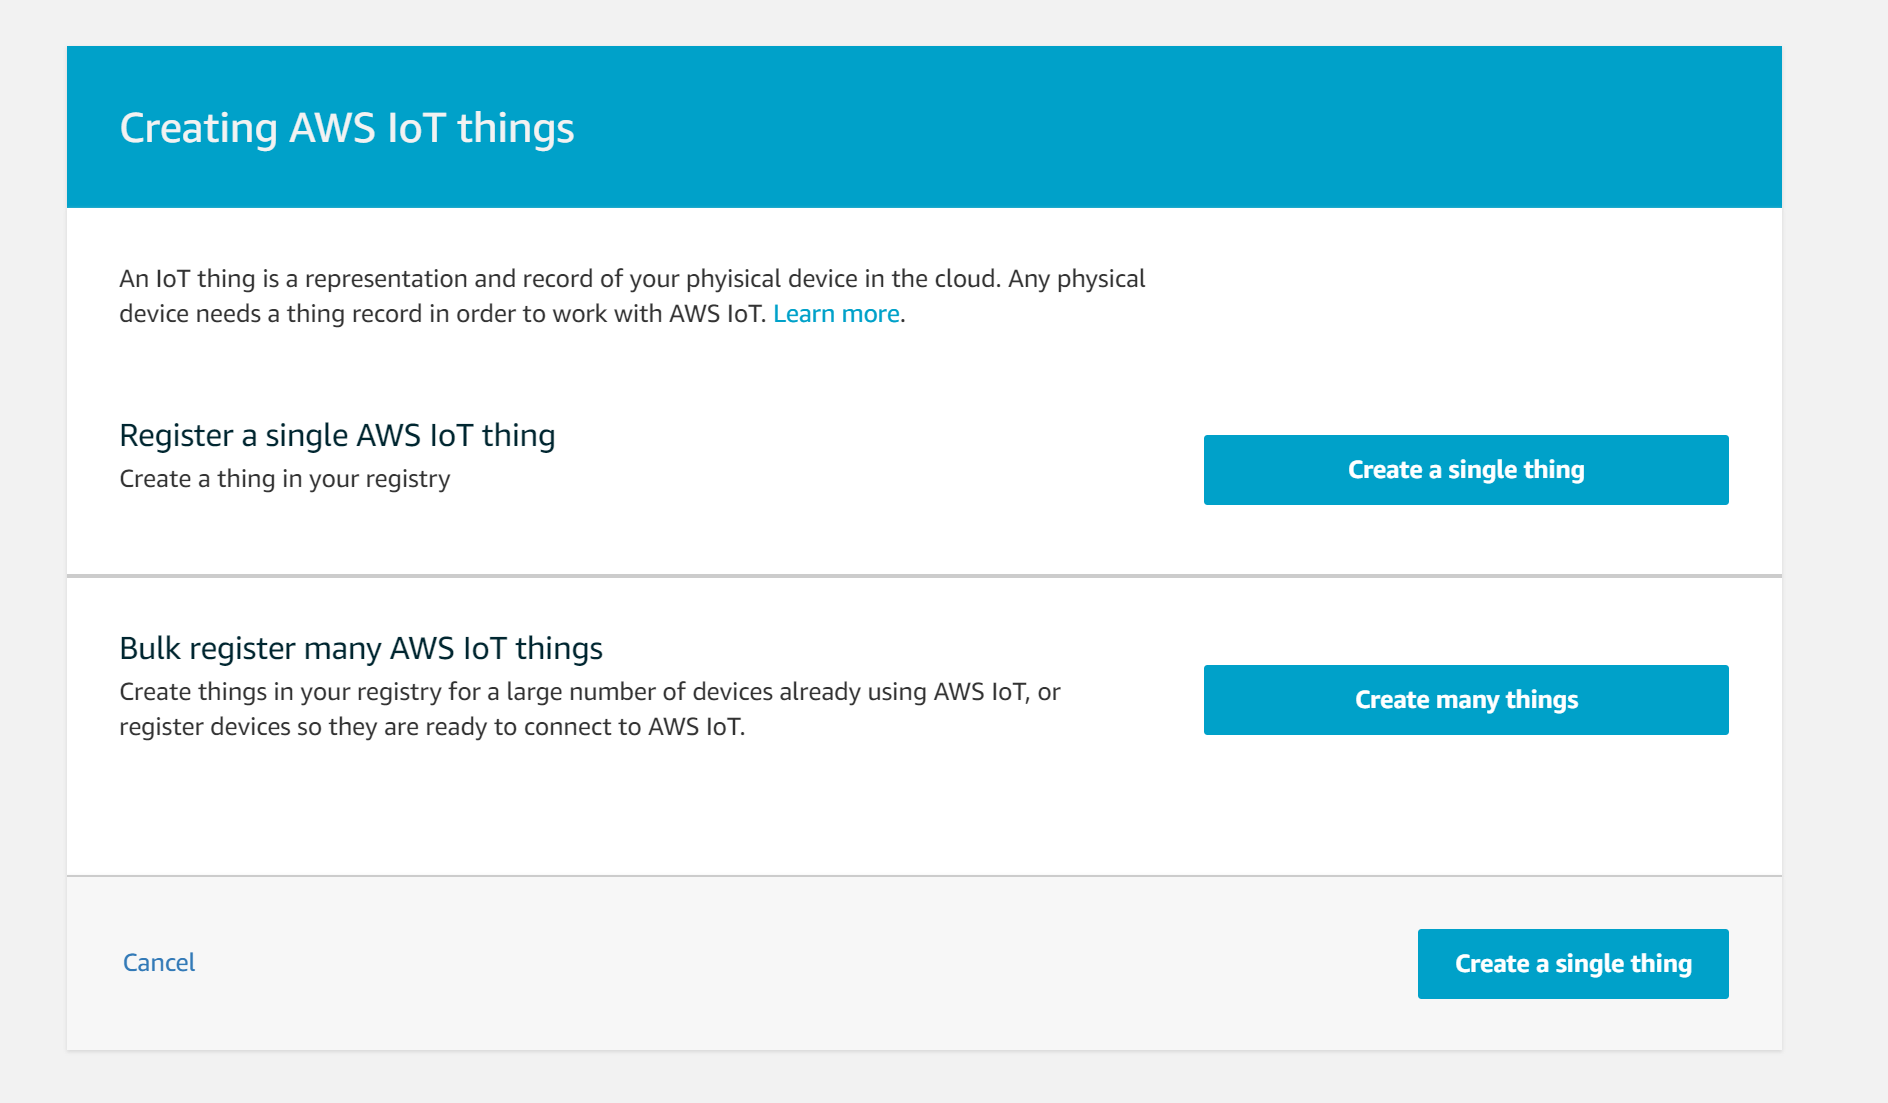
Click on “Create a single thing” (AWS defines a device as a “thing”) and follow the steps provided.
We will name our thing using the last 4 digits of the MAC address of our BB-400 and click next.
The next page is about certificates, click on the “One-click certificate creation” option and you will see that 3 files have been downloaded: a certificate for the device, a public key and a private key. Copy the files onto your BB-400. Please note that if you do not already have a root CA you will need to download one to connect your device to AWS. Please follow the steps provided to download a root CA.
Next, click on Activate and proceed to “Attach a policy.” A policy provides specified permissions to your device. Give your policy a name and ensure that in the Action box you type “iot:*”, allow all Resource ARN’s using an asterisk “*”, and check the “allow” Effect box:
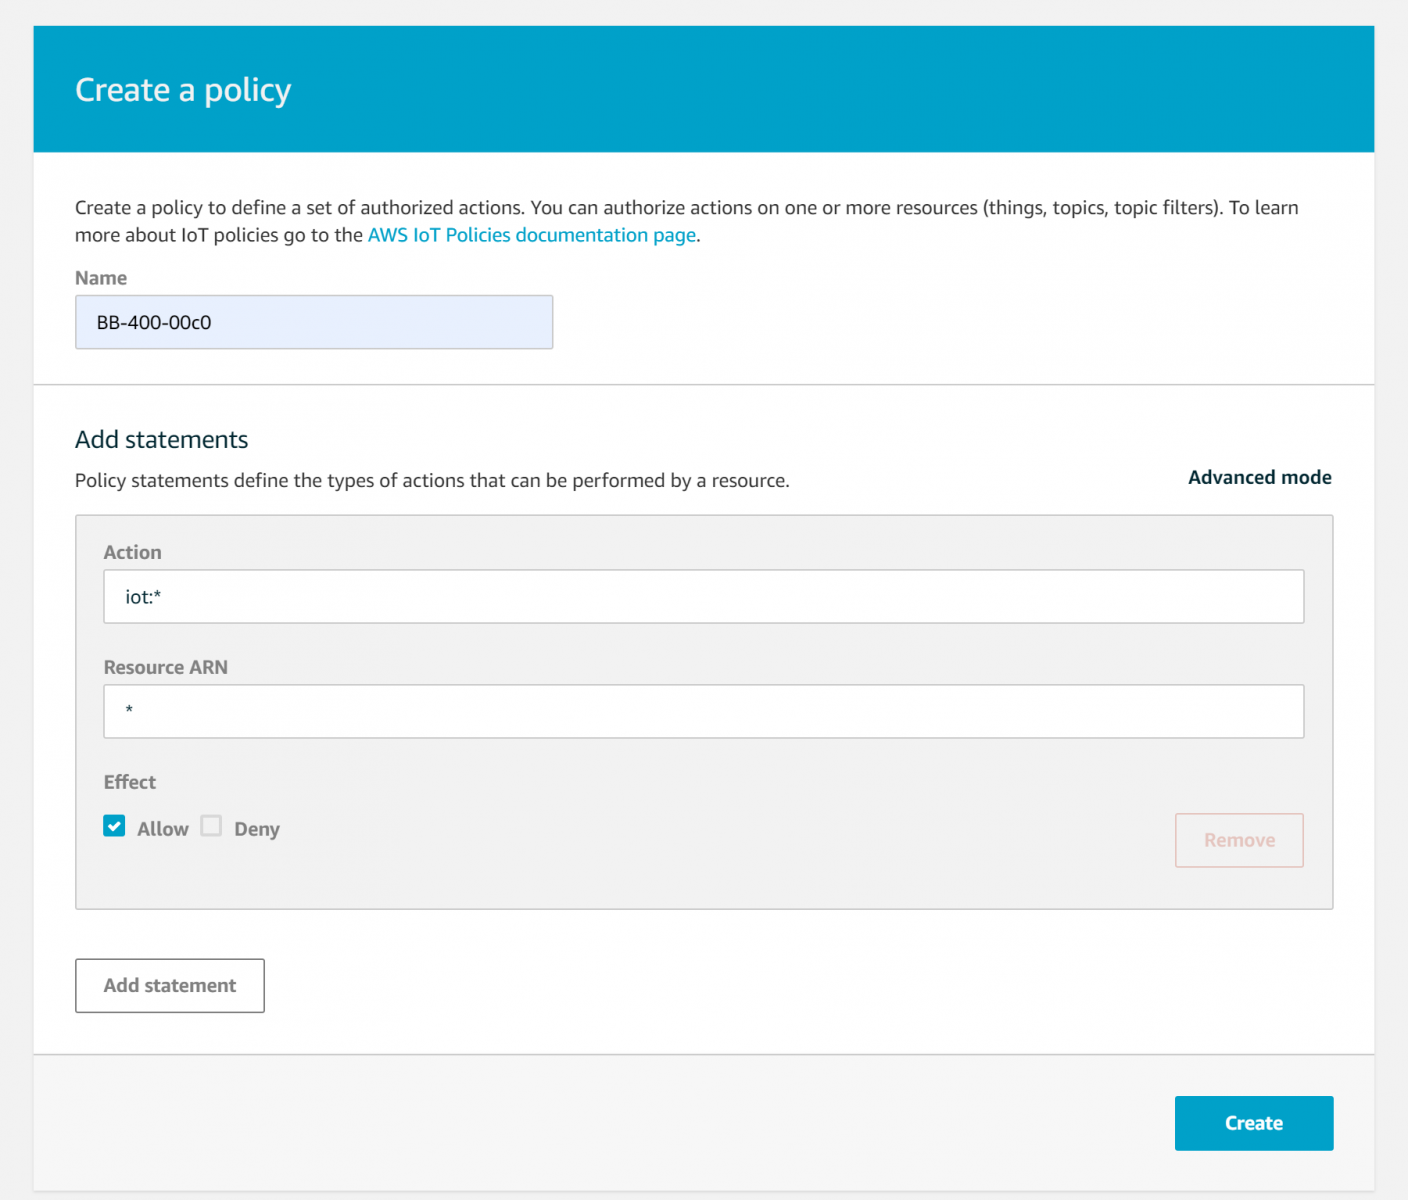
Next we need to attach the policy to the certificate to provide permissions to the device.
On IoT navigate to Manage, click on your thing, go to Security and click on your certificate:
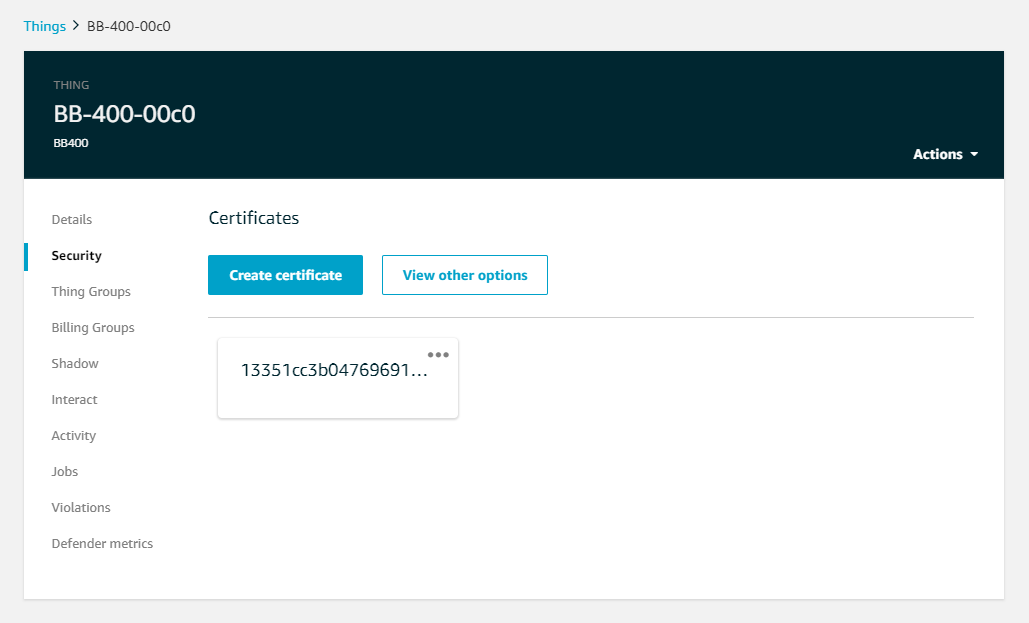
Clicking on the three dots on the certificate will bring up a drop-down menu, we want to click on the Attach policy option:
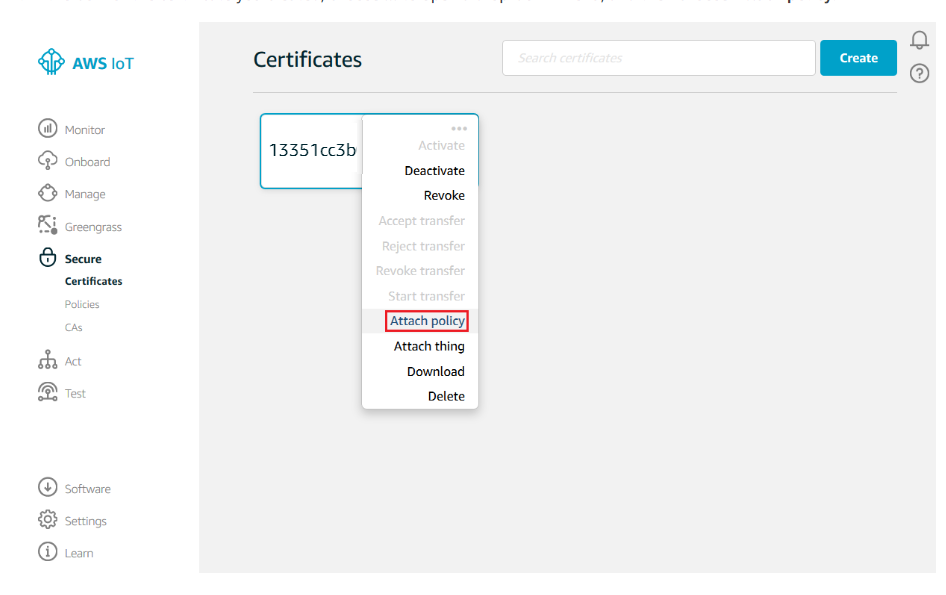
Next we need to attach our certificate to our thing. Again, click on the drop-down menu, but instead click on Attach thing and select your device:
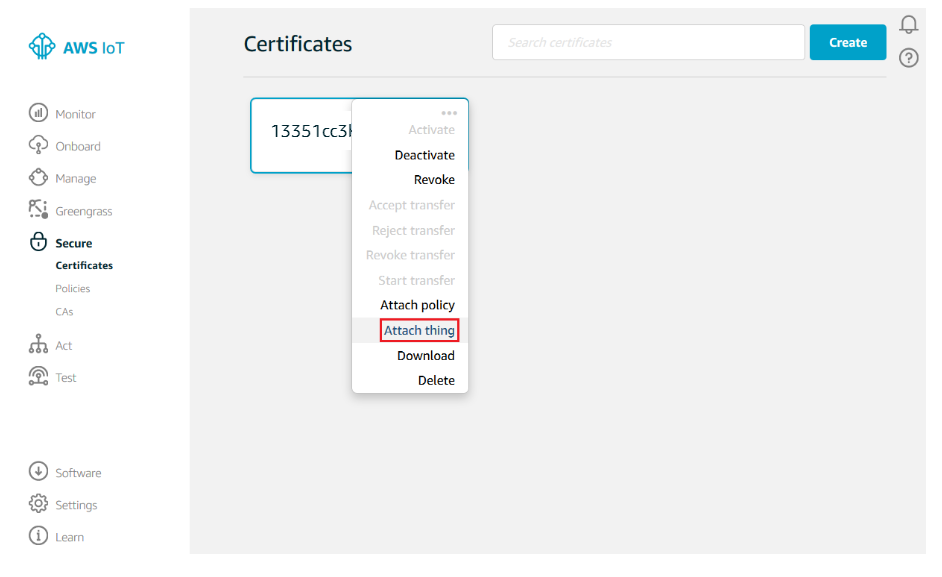
Now we have finished setting up our AWS account, and configuring our device with the correct certificate, keys and policy.
Setup Node-RED to send BB-400’s IO status to AWS
Now we will setup our Node-RED instance so that we can connect to AWS, and send and receive data.
Firstly, we will use a WebSocket input node  to send the IO status, and double click to configure it as follows:
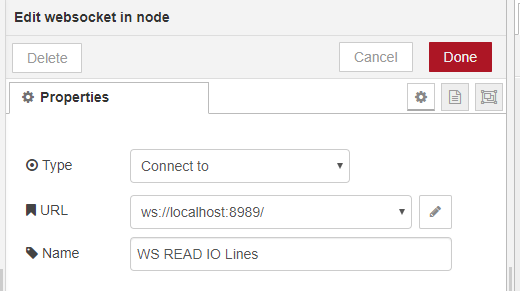
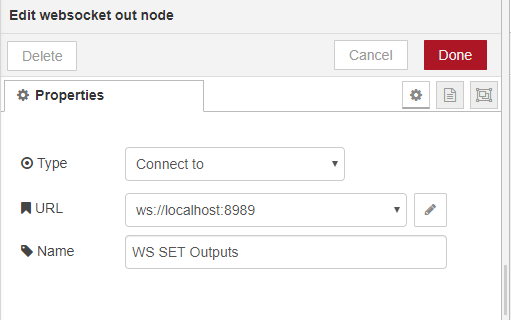
The Type should be changed to “Connect to”, and the URL should be set to “ws://localhost:8989” where 8989 is the port number of the WebSocket port.
Next we will use a JSON node  to convert the string to a object, and connect this to the WebSocket input node.
Now we will configure the MQTT output node  to send data to AWS.
Double clicking on the node gives us options for server name and topic:
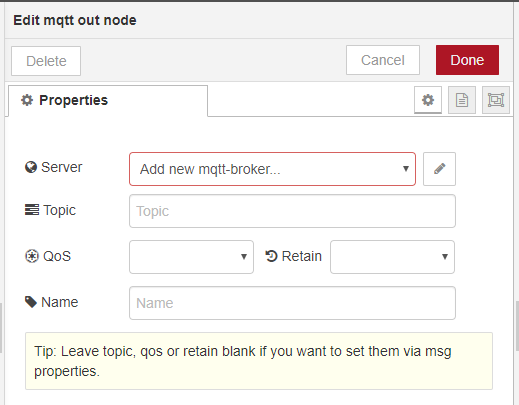
On this menu leave the server name (we will add it to the next menu), QoS and Retain values blank, type in a topic name and then click on the pencil next to the server name for further configuration.
Here we will add the server name:
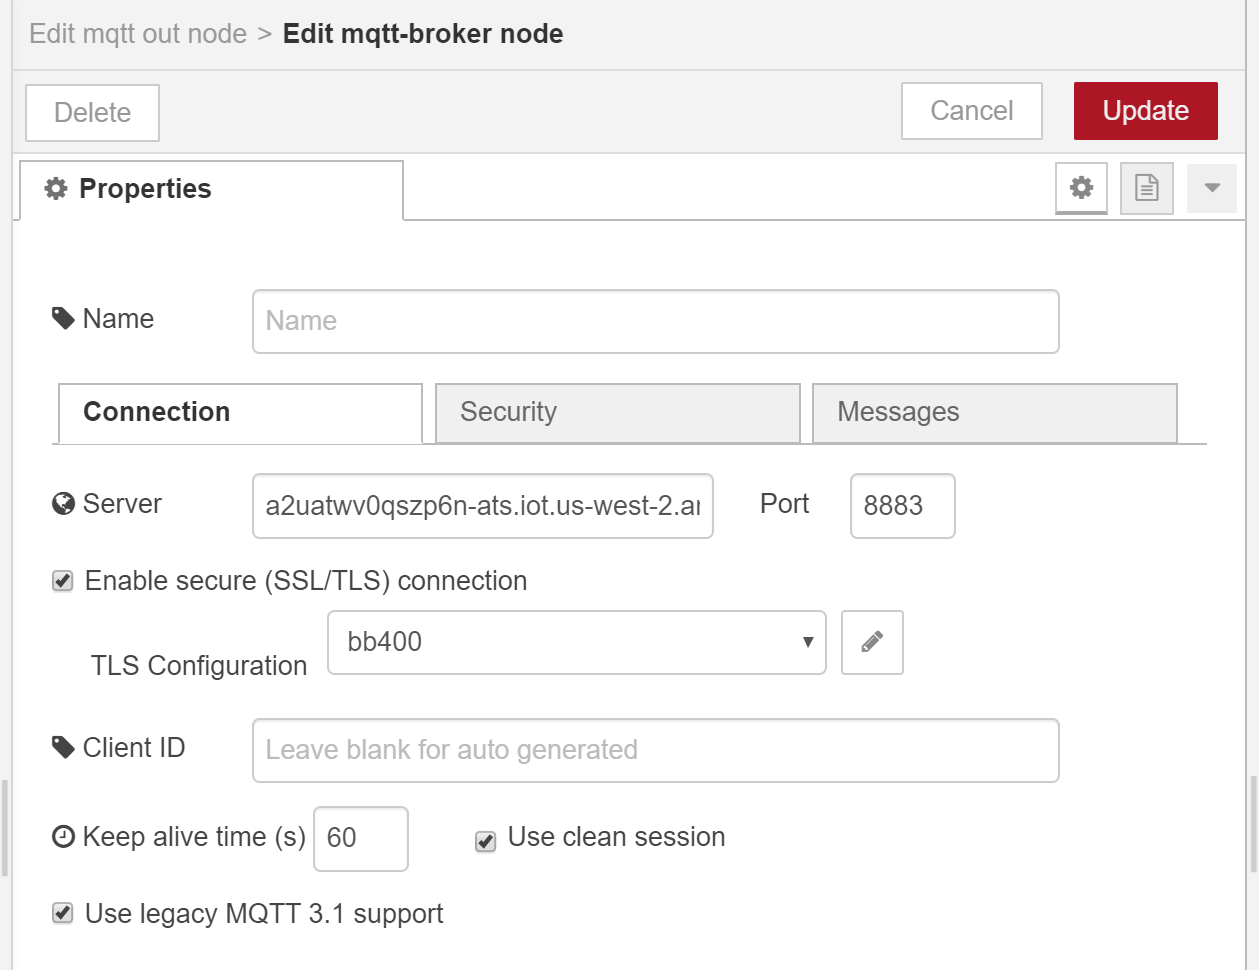
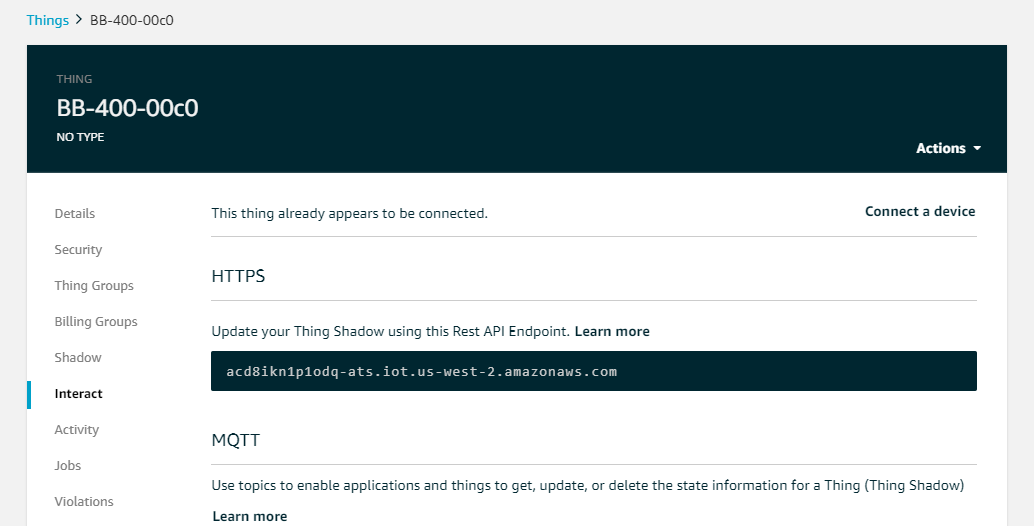
The server name can be found by going to IoT Core > Manage, clicking on your thing and going to Interact. The HTTPS REST API Endpoint is the server name:
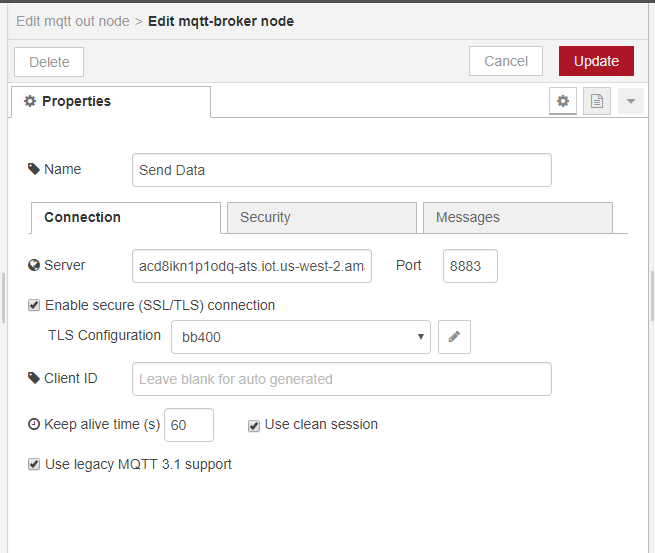
Set the Port number to 8883, keep the Client ID blank and enable SSl/TLS connection. Then, click on the pencil for the next step, which is to upload the certificates:
Upload the device certificate, private key and CA certificate:
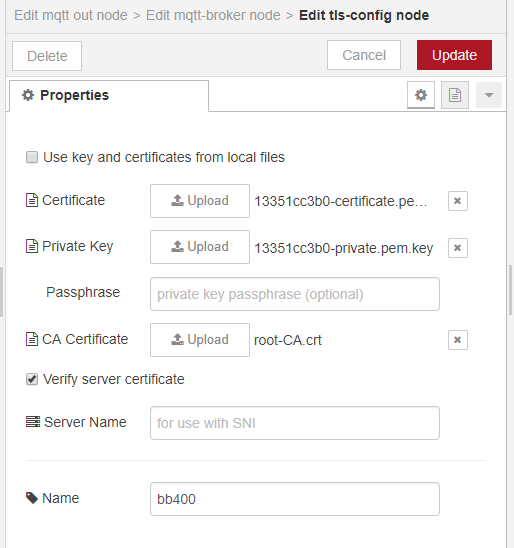
Click update and the node is ready to connect to AWS.
Finally, add a debug node  and connect it to the JSON node.
Now the flow is ready to be deployed and you should be connected to AWS.
Below is the flow that we have just created:

See events being sent from BB-400’s Node-RED on AWS
Navigate to IoT Core and click on Test. The MQTT client will connect to the device. Enter in the Subscription topic, which should be the same as the topic name you gave the MQTT node in Node-RED.
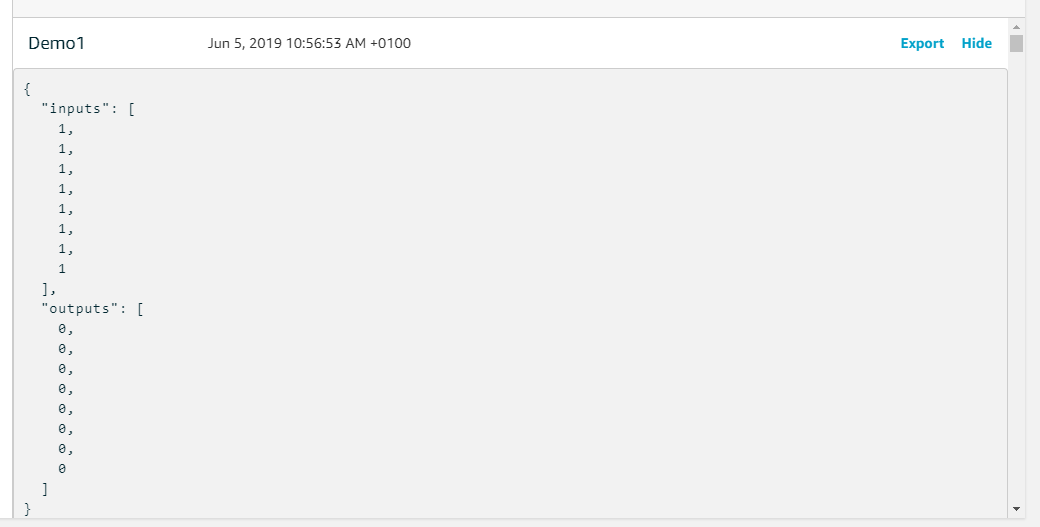
Click on Subscribe to topic and you should see the IO status events being sent to the MQTT client:
Send message from AWS to Node-RED
You can also setup a flow to receive events from AWS. We will use an MQTT input node instead, and set it up with the same settings as before. We will use a JSON node, a debug node and a websocket output node:
Going back to AWS MQTT client, change the message to set the outputs to off:

Clicking on deploy should set all the outputs to off.
Below is the flow to send a message to set the outputs off, from AWS to the BB-400:

Export flows
Below is the Node-RED flow that we have created in this FAQ.
You can copy the flow and paste it into your Node-RED instance. Remember to update your nodes accordingly and upload your certificates.
[
    {"id":"21306daf.c36062","type":"tab","label":"Cloud Connectors","disabled":false,"info":"# Cloud Connectors ExamplenThis flow gives you an example on how you can connect to many popular clouds, for sending and receiving data from your BB-400.nnFor this flow to work:n* You will need to configure the cloud connector you want with an endpoint [&] credentials.nn# **Brainboxes Node-RED FAQ**nNeed more help or tutorials on using Node-RED? Go to: nhttps://www.brainboxes.com/faqs/search/Node-RED"},
    {"id":"d55d8607.b6d778","type":"mqtt out","z":"21306daf.c36062","name":"Send To AWS","topic":"IOStatus","qos":"","retain":"","broker":"f5d9cd2b.438dc","x":500,"y":200,"wires":[]},
    {"id":"74180950.8b4468","type":"debug","z":"21306daf.c36062","name":"","active":true,"tosidebar":true,"console":false,"tostatus":false,"complete":"false","x":490,"y":140,"wires":[]},
    {"id":"6187d782.228908","type":"mqtt in","z":"21306daf.c36062","name":"Receive from AWS","topic":"IOStatus","qos":"0","datatype":"auto","broker":"e0d52363.f231d","x":110,"y":460,"wires":[["37131b02.9b2e54"]]},
    {"id":"7b5d8ede.0957f","type":"debug","z":"21306daf.c36062","name":"","active":true,"tosidebar":true,"console":false,"tostatus":false,"complete":"false","x":510,"y":480,"wires":[]},
    {"id":"4673bcba.0d5d64","type":"websocket out","z":"21306daf.c36062","name":"WS SET Outputs","server":"","client":"8edb809e.ee81b","x":530,"y":520,"wires":[]},
    {"id":"e54791b0.ee331","type":"websocket in","z":"21306daf.c36062","name":"WS READ IO Lines","server":"","client":"d021bf7c.8e358","x":110,"y":201,"wires":[["52bdf1e3.c05ca"]]},
    {"id":"52bdf1e3.c05ca","type":"json","z":"21306daf.c36062","name":"","property":"payload","action":"","pretty":false,"x":286,"y":201,"wires":[["74180950.8b4468","d55d8607.b6d778"]]},
    {"id":"37131b02.9b2e54","type":"json","z":"21306daf.c36062","name":"","property":"payload","action":"","pretty":true,"x":330,"y":520,"wires":[["4673bcba.0d5d64","7b5d8ede.0957f"]]},
    {"id":"3d9958b1.3167b8","type":"comment","z":"21306daf.c36062","name":"see: http://www.brainboxes.com/faq/items/how-do-i-connect-my-bb-400-to-amazon-web-services","info":"","x":930,"y":200,"wires":[]},
    {"id":"9aaef320.aebcc","type":"comment","z":"21306daf.c36062","name":"Don't see the cloud connector you are looking for? Please get in touch - [email protected]","info":"","x":350,"y":660,"wires":[]},
    {"id":"83d7eac8.f2b098","type":"comment","z":"21306daf.c36062","name":"- Sending data to the cloud","info":"","x":130,"y":160,"wires":[]},
    {"id":"a4b831d7.1f035","type":"comment","z":"21306daf.c36062","name":"1. Enable this flow by double clicking "Cloud Connectors" above","info":"","x":250,"y":20,"wires":[]},
    {"id":"fd04f788.40a698","type":"comment","z":"21306daf.c36062","name":"2. Then make sure to DEPLOY this flow by clicking the button located in the top right","info":"","x":310,"y":60,"wires":[]},
    {"id":"20e4aec7.e864b2","type":"comment","z":"21306daf.c36062","name":"- Receiving data from the cloud","info":"","x":150,"y":420,"wires":[]},
    {"id":"f5d9cd2b.438dc","type":"mqtt-broker","z":"","name":"","broker":"","port":"8883","tls":"","clientid":"","usetls":true,"compatmode":true,"keepalive":"60","cleansession":true,"birthTopic":"","birthQos":"0","birthPayload":"","closeTopic":"","closeQos":"0","closePayload":"","willTopic":"","willQos":"0","willPayload":""},
    {"id":"e0d52363.f231d","type":"mqtt-broker","z":"","name":"Send Data","broker":"","port":"8883","tls":"","clientid":"","usetls":true,"compatmode":true,"keepalive":"60","cleansession":true,"birthTopic":"","birthQos":"0","birthPayload":"","closeTopic":"","closeQos":"0","closePayload":"","willTopic":"","willQos":"0","willPayload":""},
    {"id":"8edb809e.ee81b","type":"websocket-client","z":"","path":"ws://localhost:8989","tls":"","wholemsg":"false"},
    {"id":"d021bf7c.8e358","type":"websocket-client","z":"","path":"ws://localhost:8989/","tls":"","wholemsg":"false"},
    {"id":"6ba48b1.79f5e74","type":"tls-config","z":"","name":"bb400","cert":"","key":"","ca":"","certname":"","keyname":"","caname":"","servername":"","verifyservercert":false}
]
In this FAQ we have explained how to create an AWS account, connect your device to AWS, configure certificates and a policy, and finally how to setup Node-RED to send and receive the BB-400’s IO status.

